This post contains affiliate links which means I may earn a small commission at no additional cost to you when you make a purchase after clicking these links. Read more about affiliate links here.
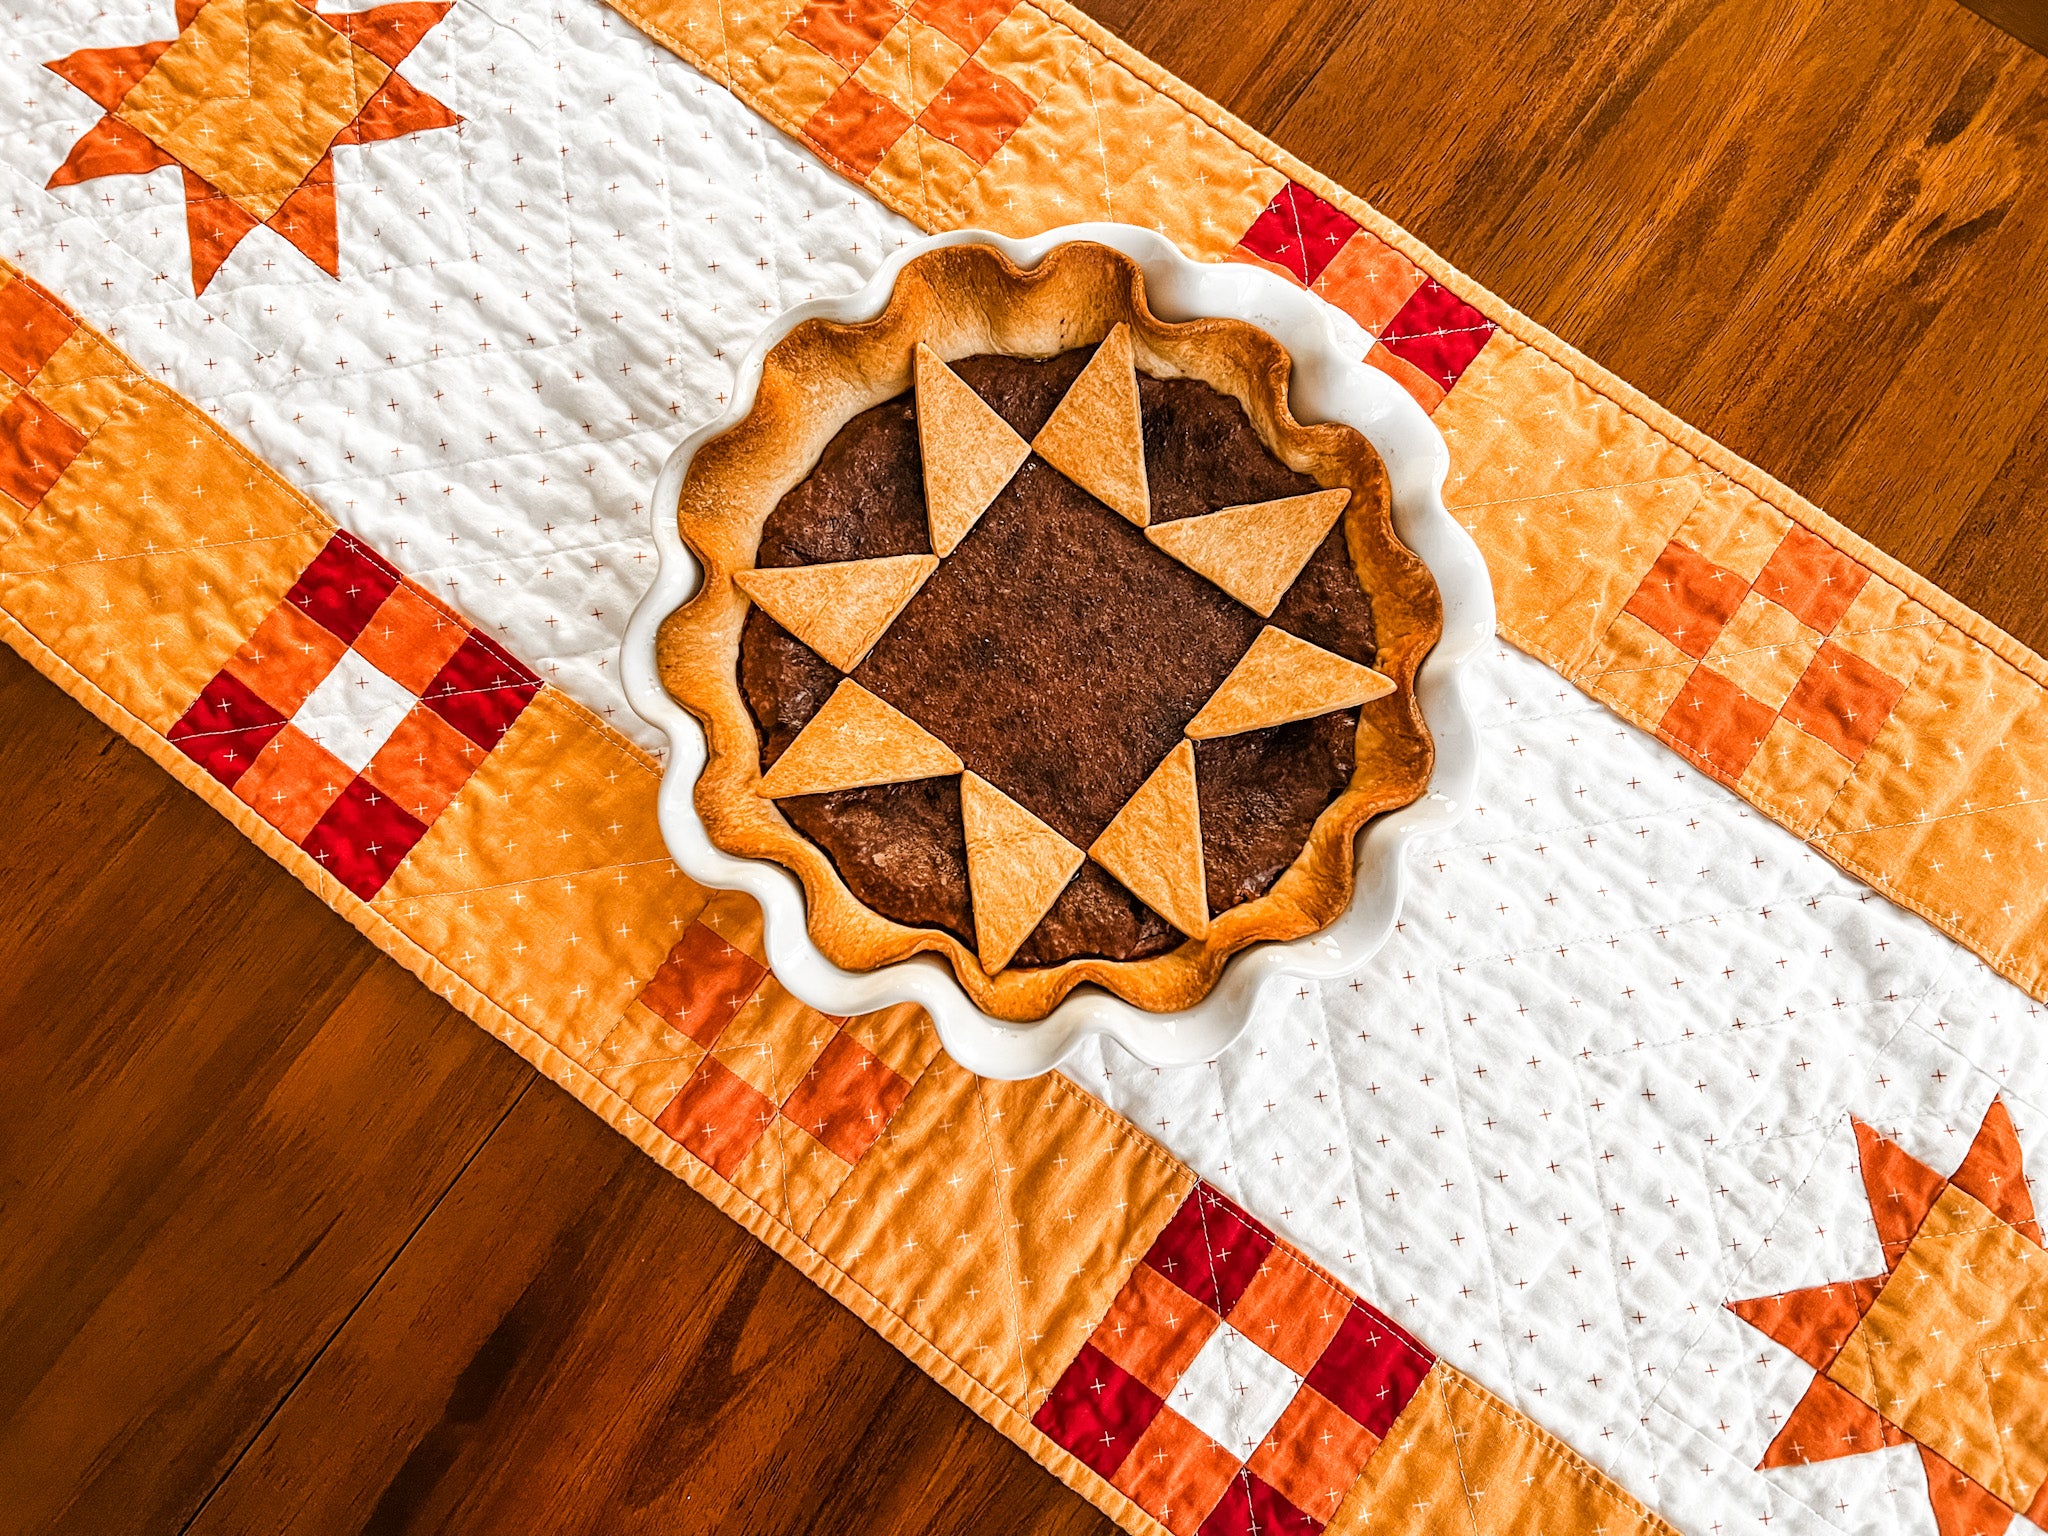
What goes perfectly with a quilted table runner? Quilted Pie.
Whip one of these up, and you’ll be the star of the spread – Thanksgiving or otherwise.
It took a few pie tries to get this method down pat, but we didn’t mind eating the test pies! I found out a few things along the way:
- Pies with a flat top work the best. Think more fudge or pumpkin, less apple or berries.
- Quilt triangles are best baked separately and added as an embellishment to a baked pie rather than baked all at once.
- “Painting” with food coloring comes out a bit too saturated. Either dilute it down, or skip it. Ultimately, I decided to skip it.
What You Need:
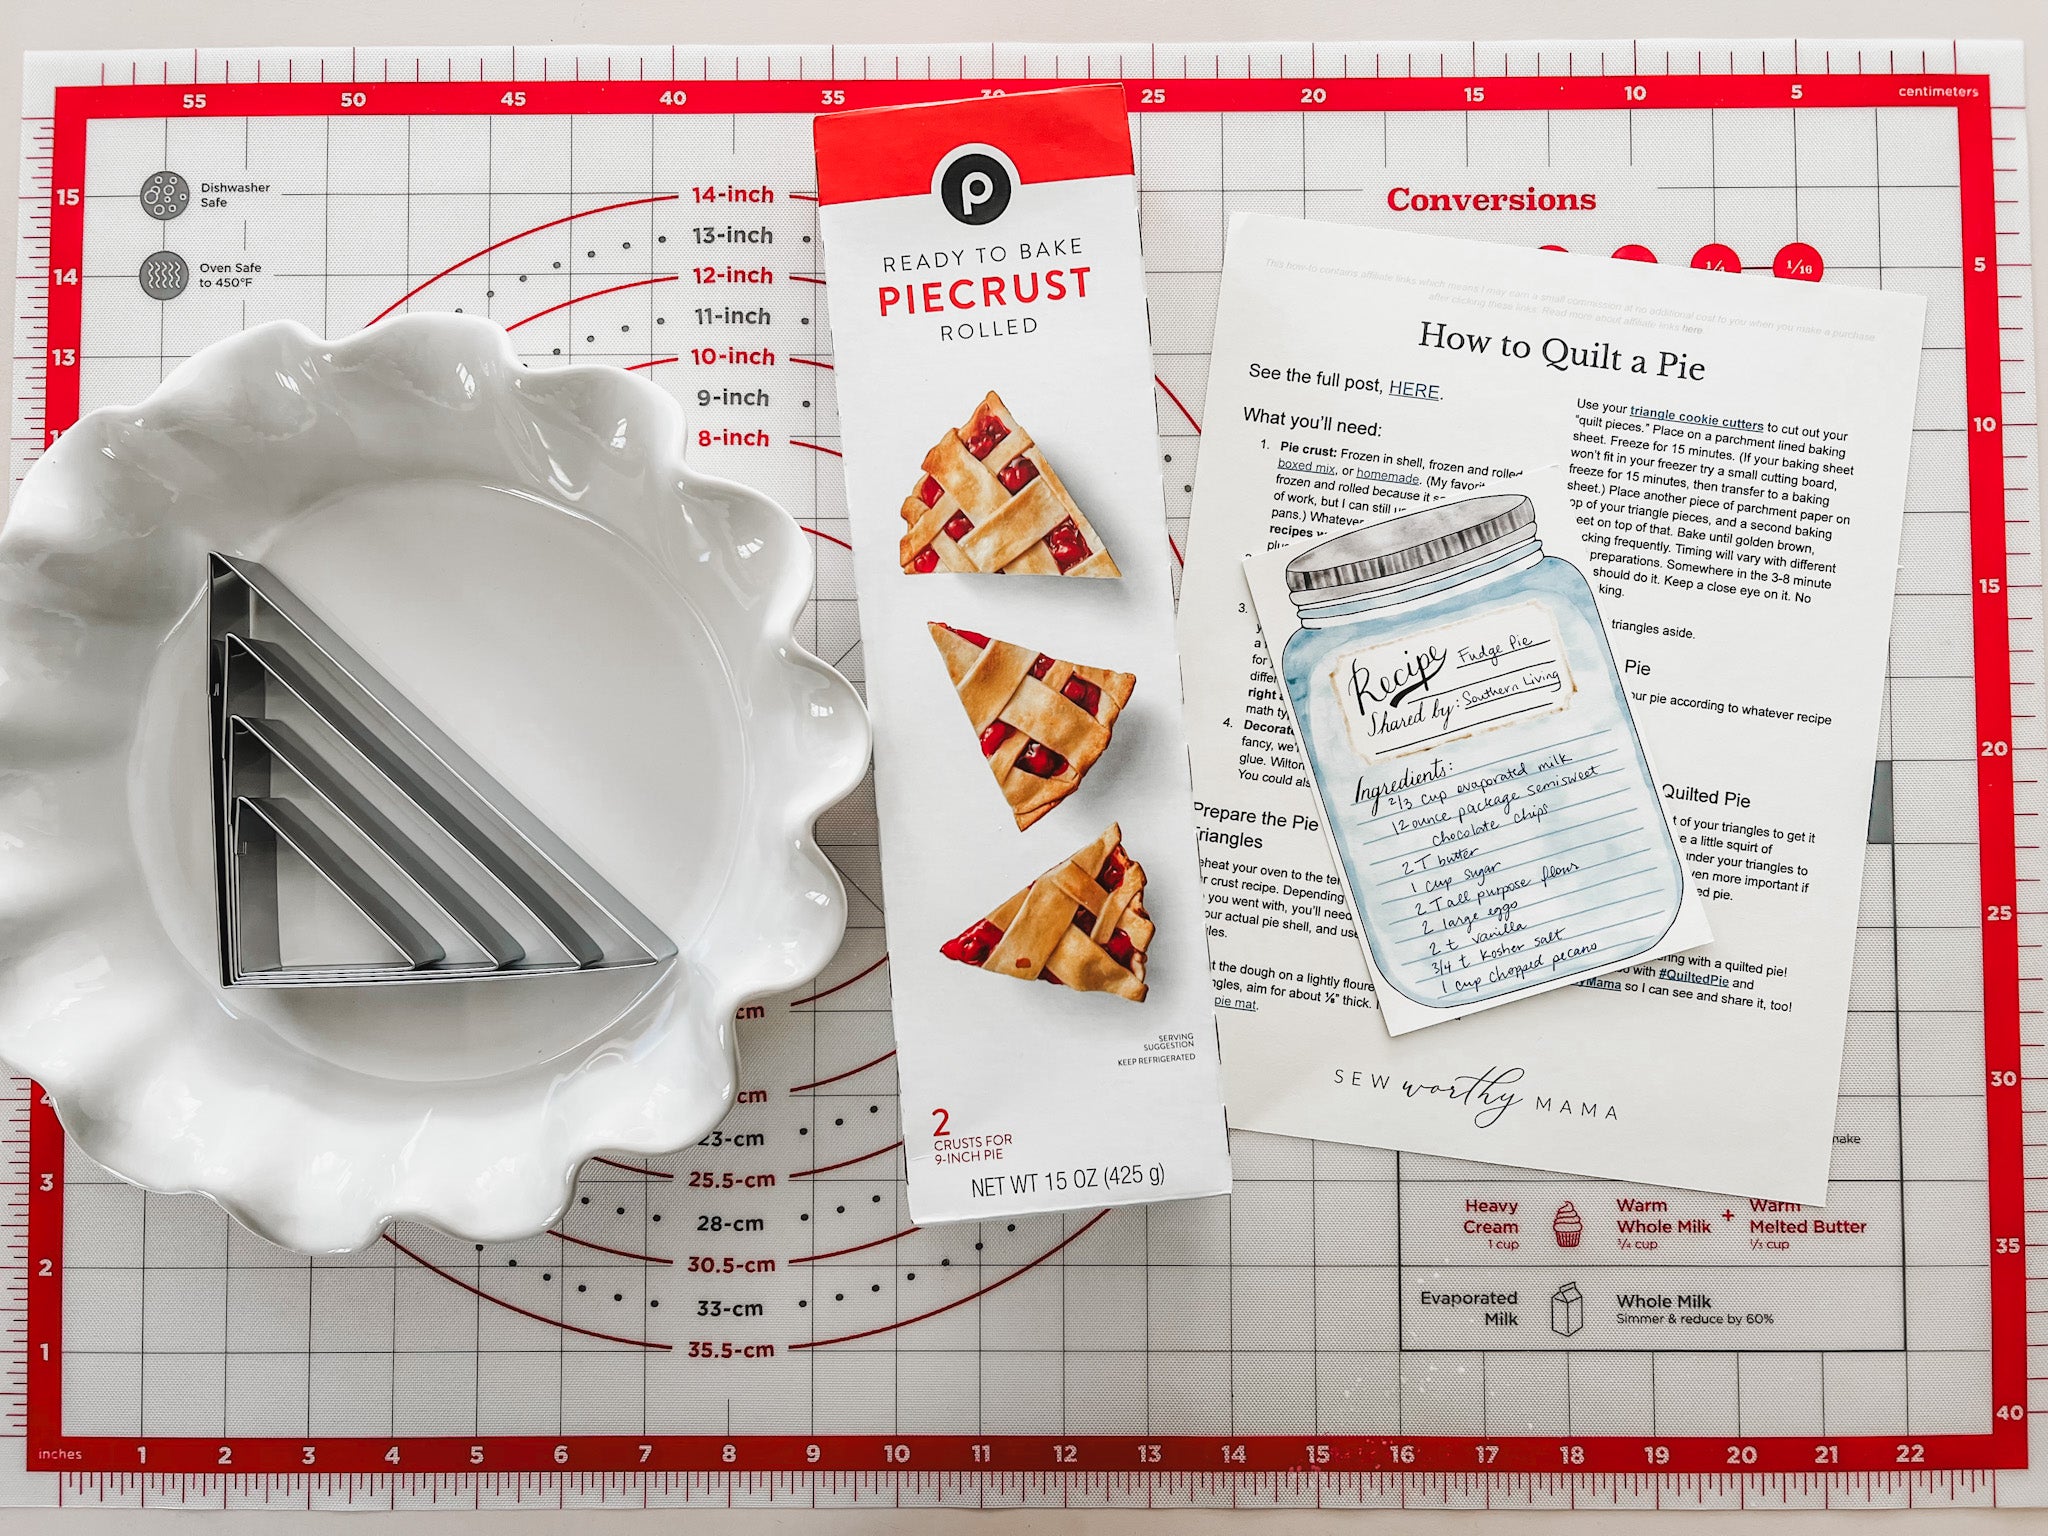
- Pie crust: Refrigerated and rolled, frozen and rolled, boxed mix, or homemade. You’ve got lots of options here. The only type that would not work is a frozen pie shell already in a pan. My favorite is refrigerated and rolled because it saves me a lot of work. Whatever you choose, you need 2 recipes worth–enough for your pie shell, plus more for the triangles on top.
- One large rimmed baking sheet and a smaller baking sheet that will nest into the larger one. This OXO set of 2 are the perfect sizes.
- Parchment paper.
- Silicone pastry mat. Trust me. Worth it.
- Pie recipe ingredients: I suggest a flat-top pie such as fudge, chess, pumpkin, or sweet potato. I use this Fudge Pie from Southern Living.
- 9.5" or larger pie dish. This allows enough room for your quilt pieces to lay flat. (My dish in these photos is smaller, and my quilt pieces had to overlap my crust and don't quite lay flush to the top of my pie. Next time, I'm using my 9.5" Pyrex pie dish.)
- Triangle cookie cutters: These will replace your rotary cutter for this quilt! This set has a few sizes so you can pick what works best for your pie and design. If you pick a different one, just make sure they have a right angle and equal sides (legs for you math types).
- Sugar "glue": Nothing fancy, we’re basically going to use it like glue. Wilton makes an edible adhesive. You could also use a dab of royal icing, decorator's icing, or writing gel.
- A plan: Follow the instructions below to assemble your quilted pie! Get a printable PDF to keep on the counter, and save your device from the flour and butter!
Prepare the Pie Crust Quilt Triangles
Preheat your oven to 400 degrees - even if your crust directions say differently. Depending on which pie crust you went with, you’ll need to reserve enough for your actual pie shell, and use the rest for your triangles. I love buying a box of 2 refrigerated, rolled crusts. One for my pie pan, one to cut triangles.
You can find dough like mine in the refrigerated section with the crescent rolls and cookie dough. I use Publix brand. If using a similar refrigerated and rolled dough, allow it to come to room temperature for 15-20 minutes before unrolling it. If using homemade dough, roll it out to about ⅛” thick.
If you don't have a silicone pie mat, I really recommend it. It makes it easy to pick your dough up, helps measure the size to match your pie pan, and makes clean-up super easy! There's nothing worse than stretching on the bias and messing up your points, am I right?!
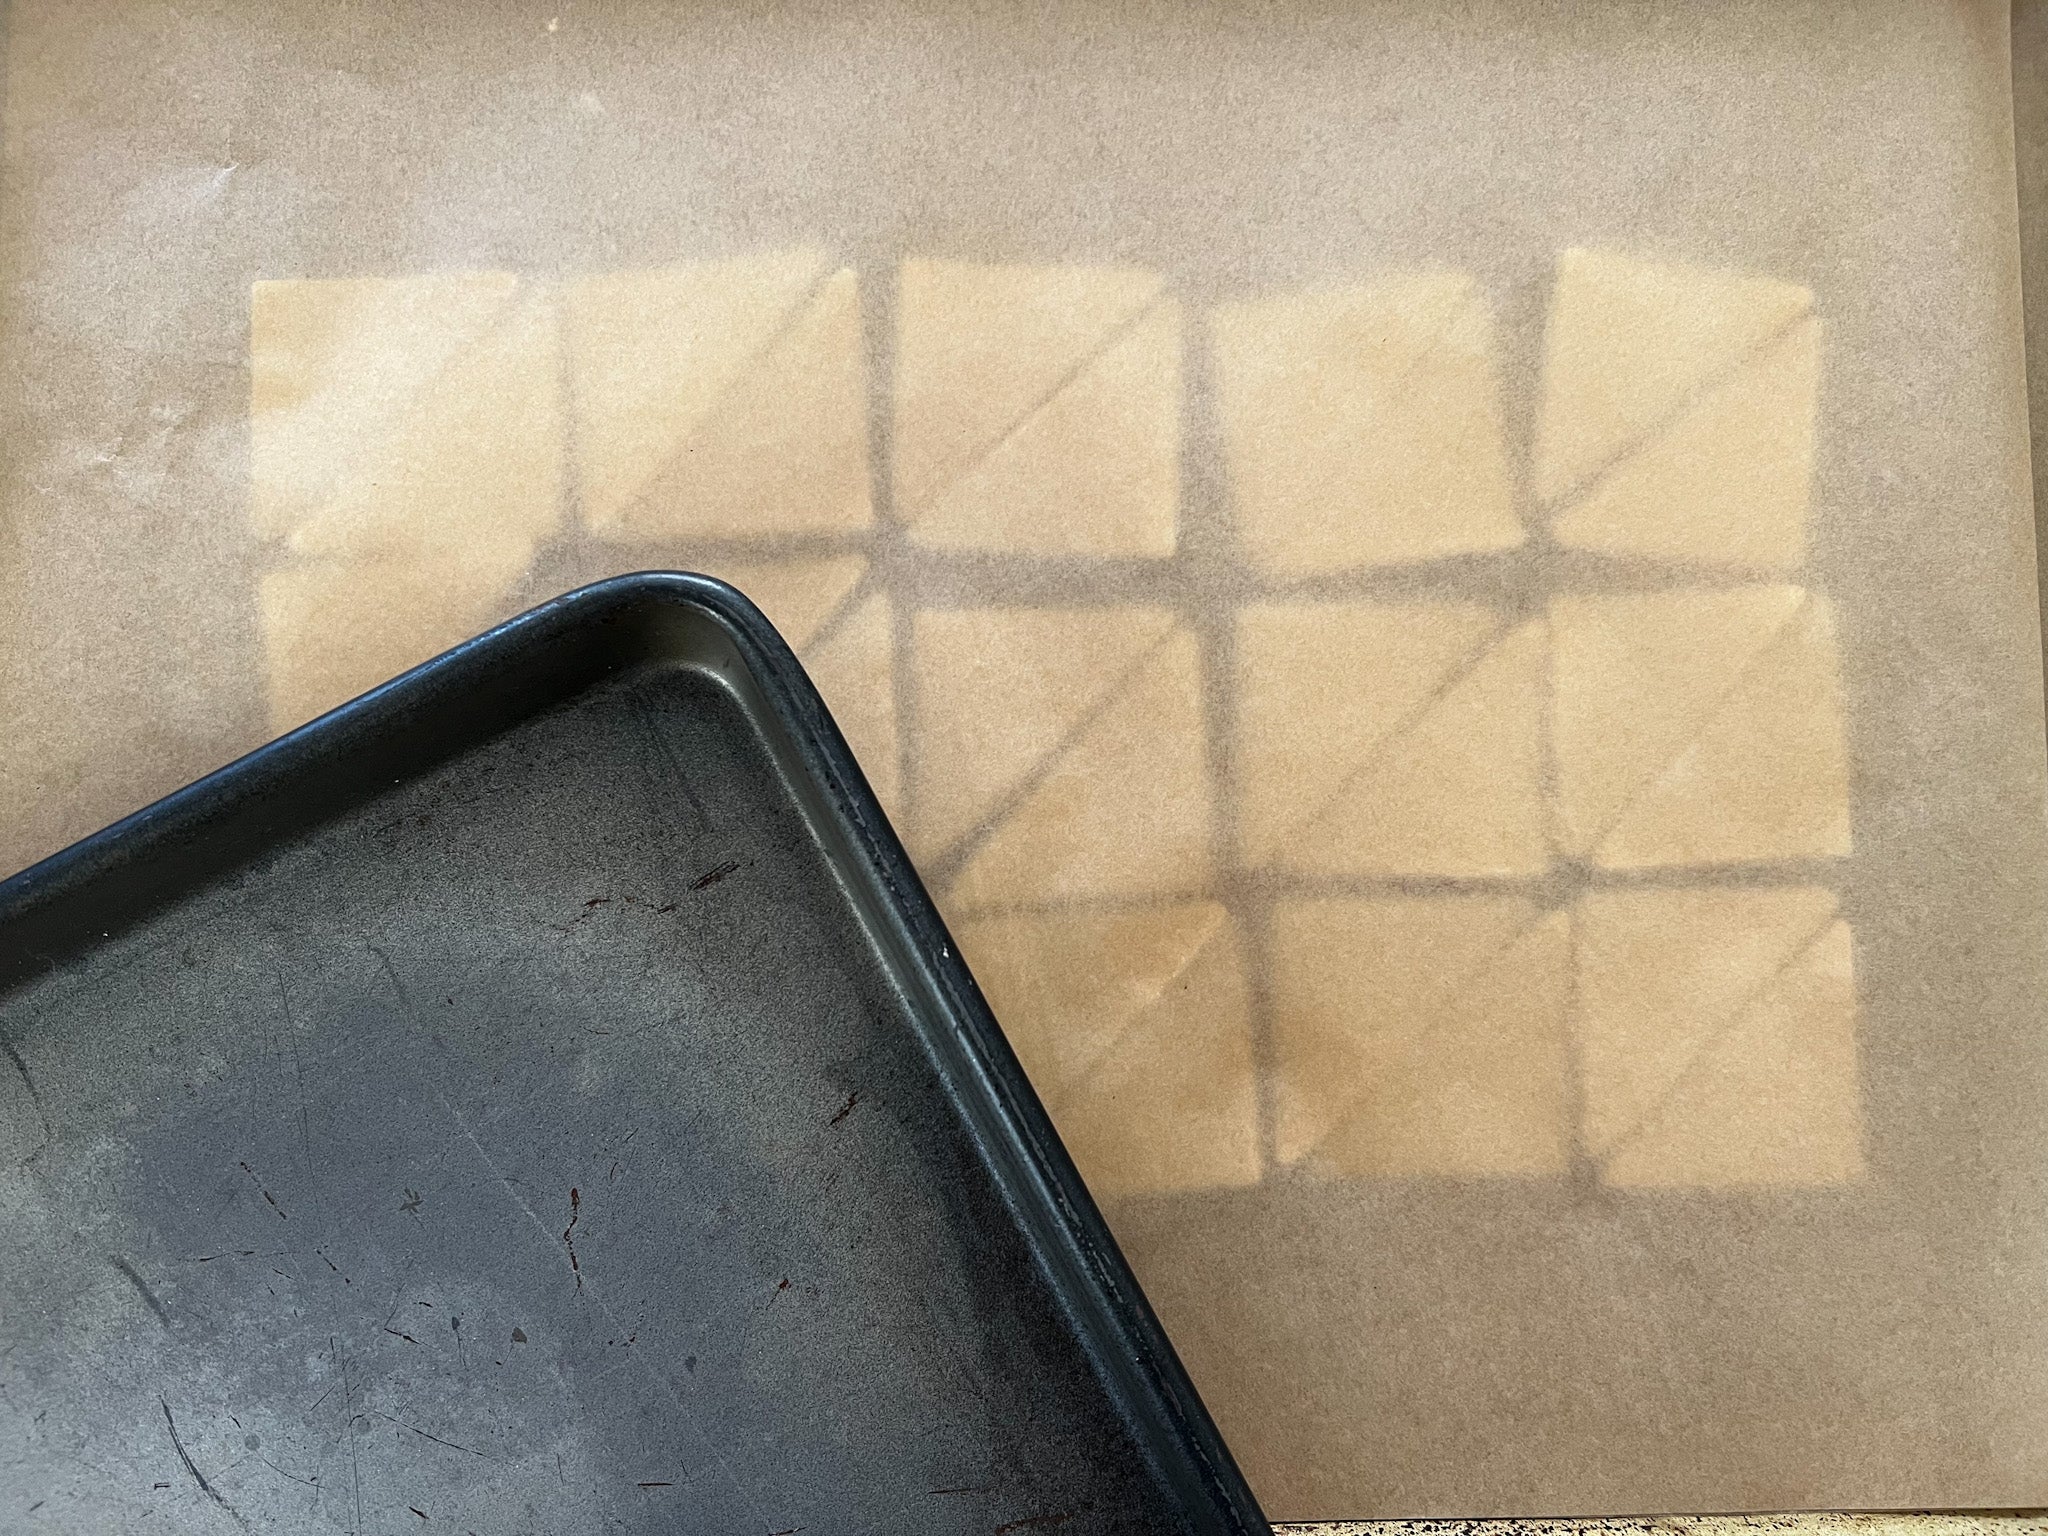
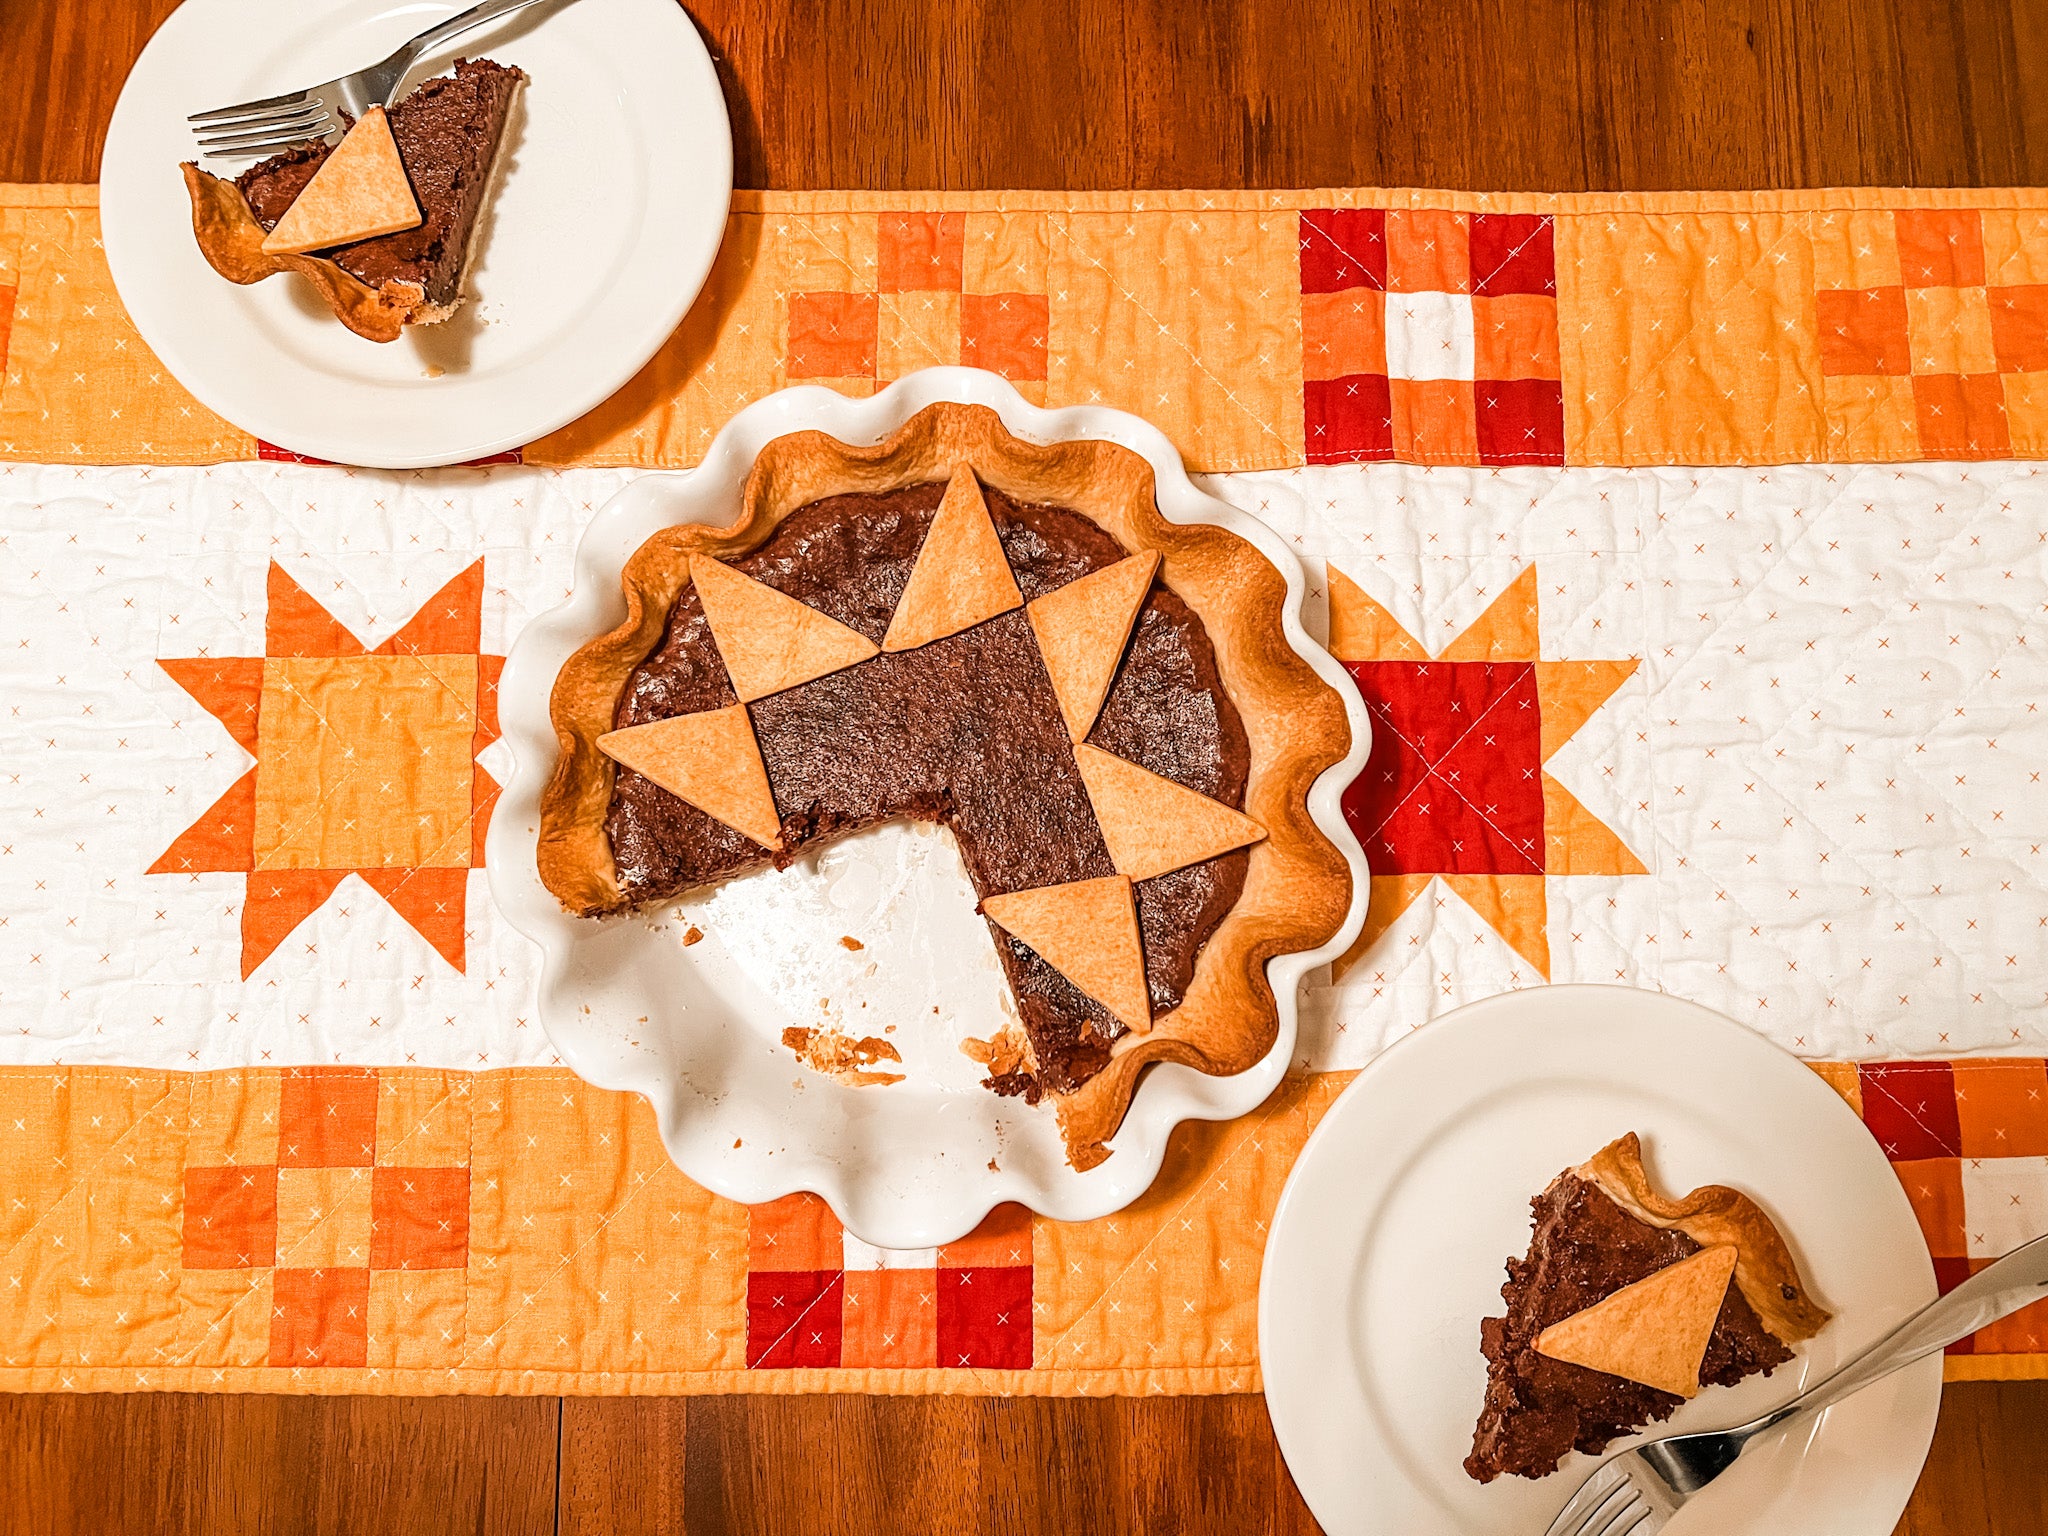
Use your triangle cookie cutters to cut out your “quilt pieces.” I like 2" triangles for a Sawtooth star pie, but you may want to use other sizes depending on your pie pan size and design.
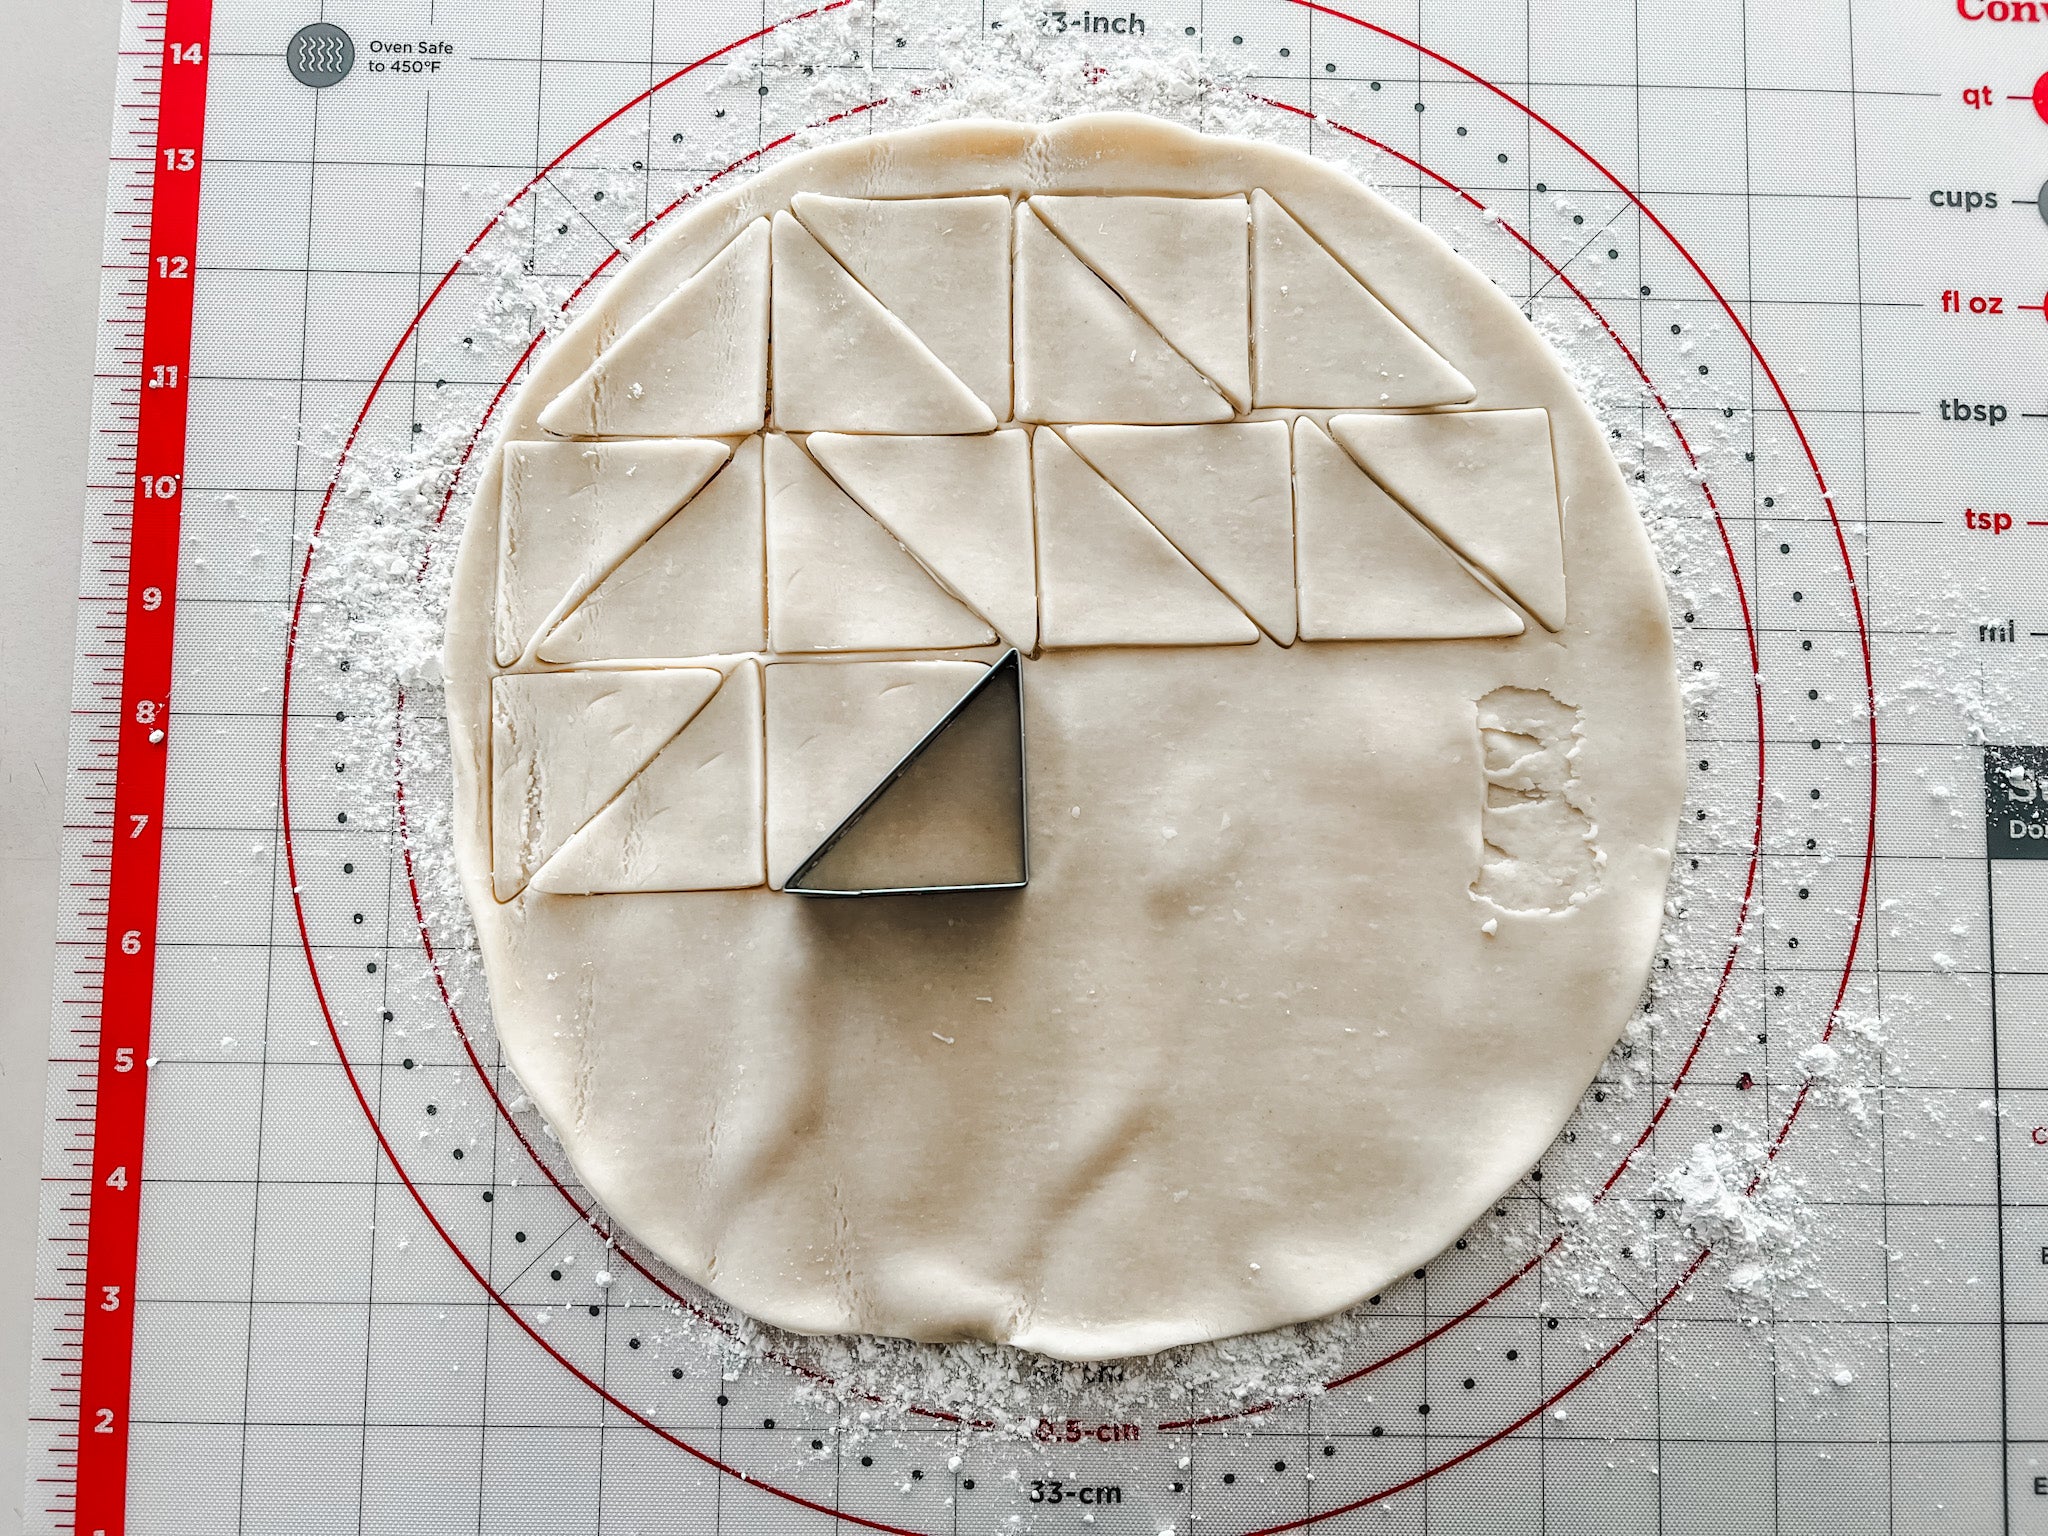
Try to cut as many triangles as you can fit. I was able to get 34 triangles from one dough disk. Don't waste any fabric dough! You can freeze extra triangles for future pies. You'll need 8-12 per pie depending on your design.
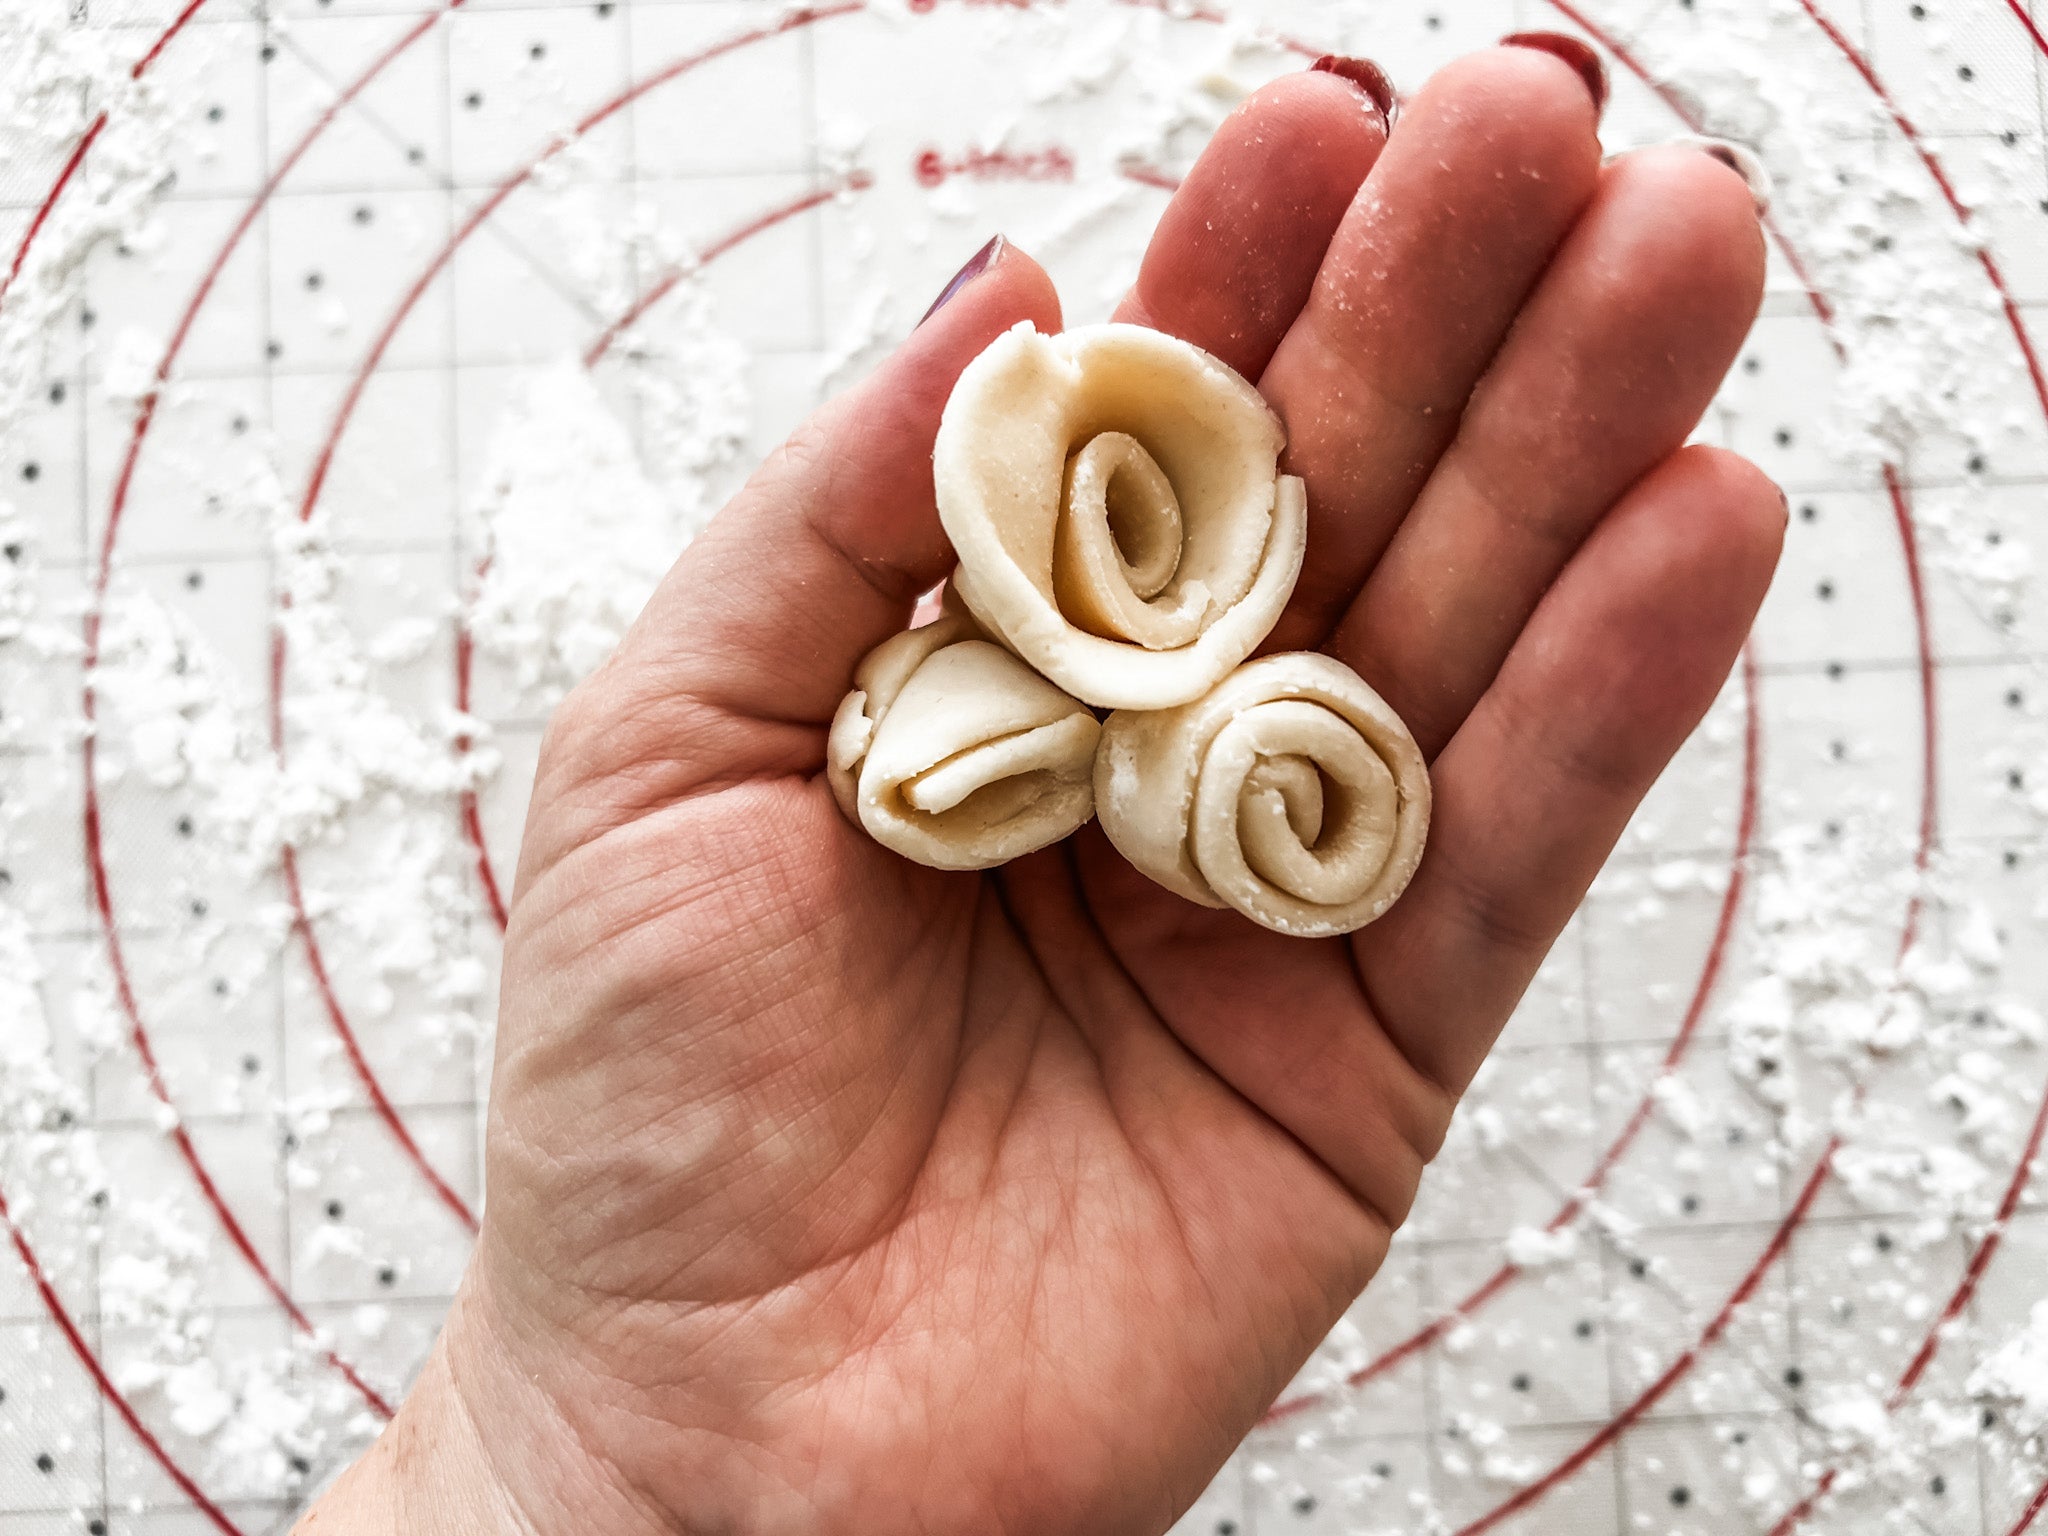
Just as I was about to throw away all my dough scraps, I could just hear my Grandma's voice in my head saying, "Well, now, that's dough, not fabric. You ought to just mash that together, and use it for something!" So, I rolled the long strips up and pinched the bottoms to make little rosettes. Thanks for the nudge, Grandma!...But wouldn't you know I forgot to actually put them on the pie and bake them. Grandma would just shrug! I tried!
Place dough triangles on the larger, parchment-lined baking sheet. Freeze for 15 minutes. (If your baking sheet won’t fit in your freezer – mine won’t – try a small cutting board, freeze for 15 minutes, then transfer to a baking sheet.)

Place another piece of parchment paper on top of the triangles, and the second, smaller baking sheet on top of that. This top baking sheet acts as a pie weight to keep your triangles flat. Be careful not to press it down into the triangles. The goal is flat, not smooshed.
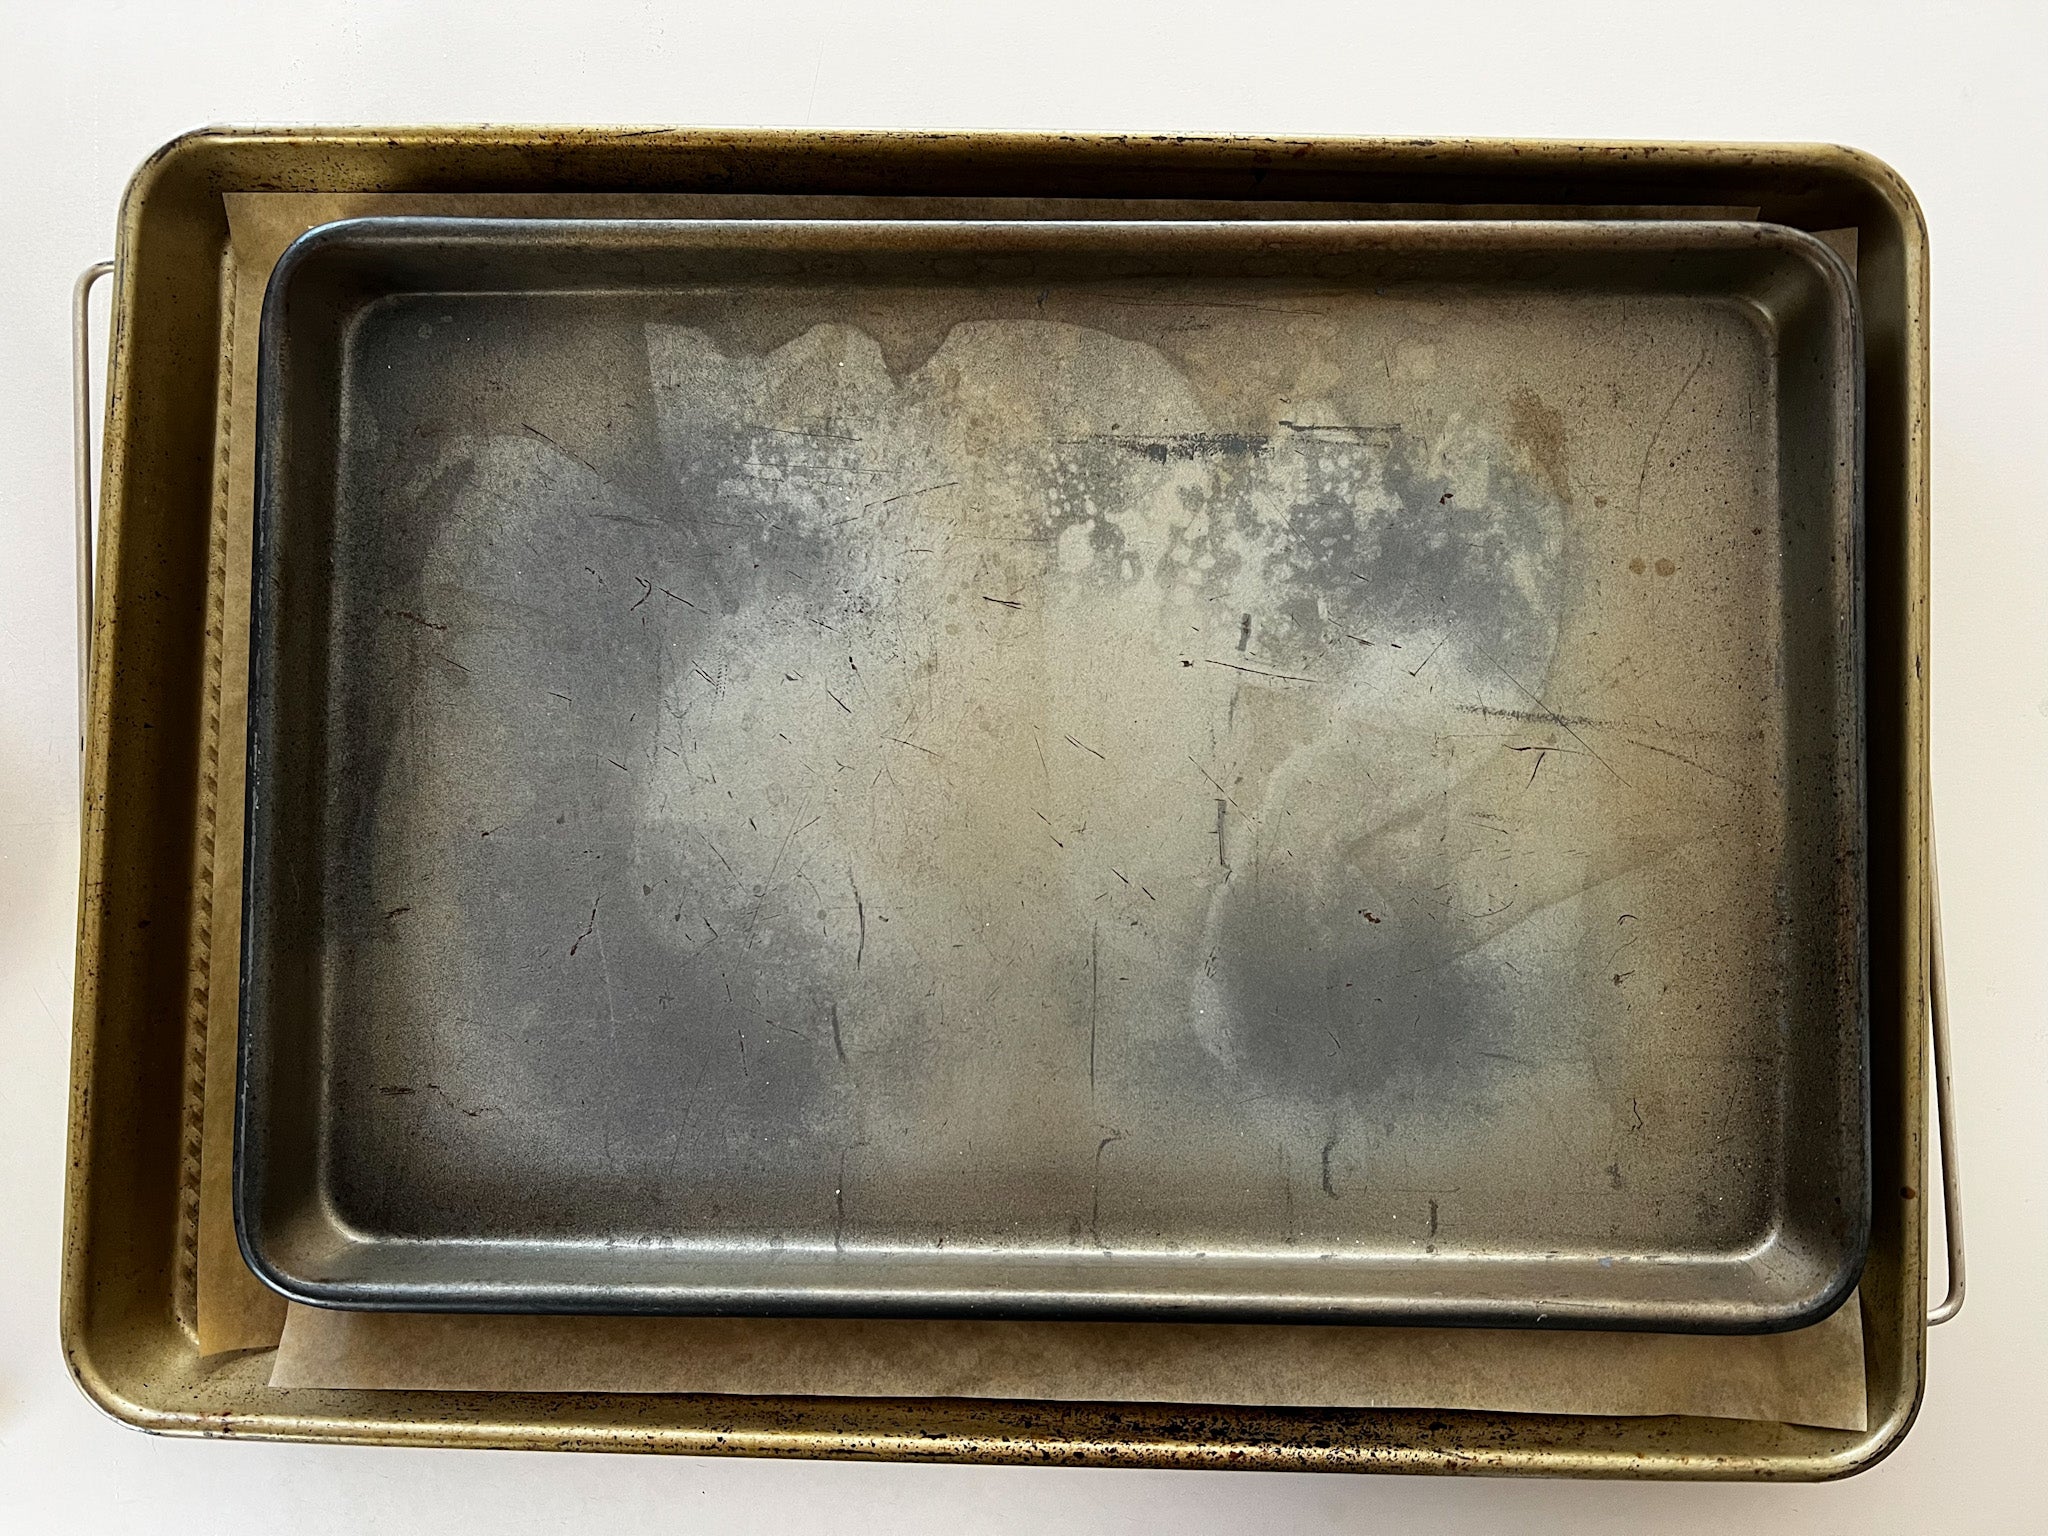
Bake for 10 minutes on the middle rack, then remove the top baking sheet and parchment paper. Continue baking until golden brown, another 4-8 minutes. Timing will vary with different crust preparations. No multitasking. Keep your eye on the iron oven. If the back is browning faster, rotate the pan. Transfer to a wire rack.
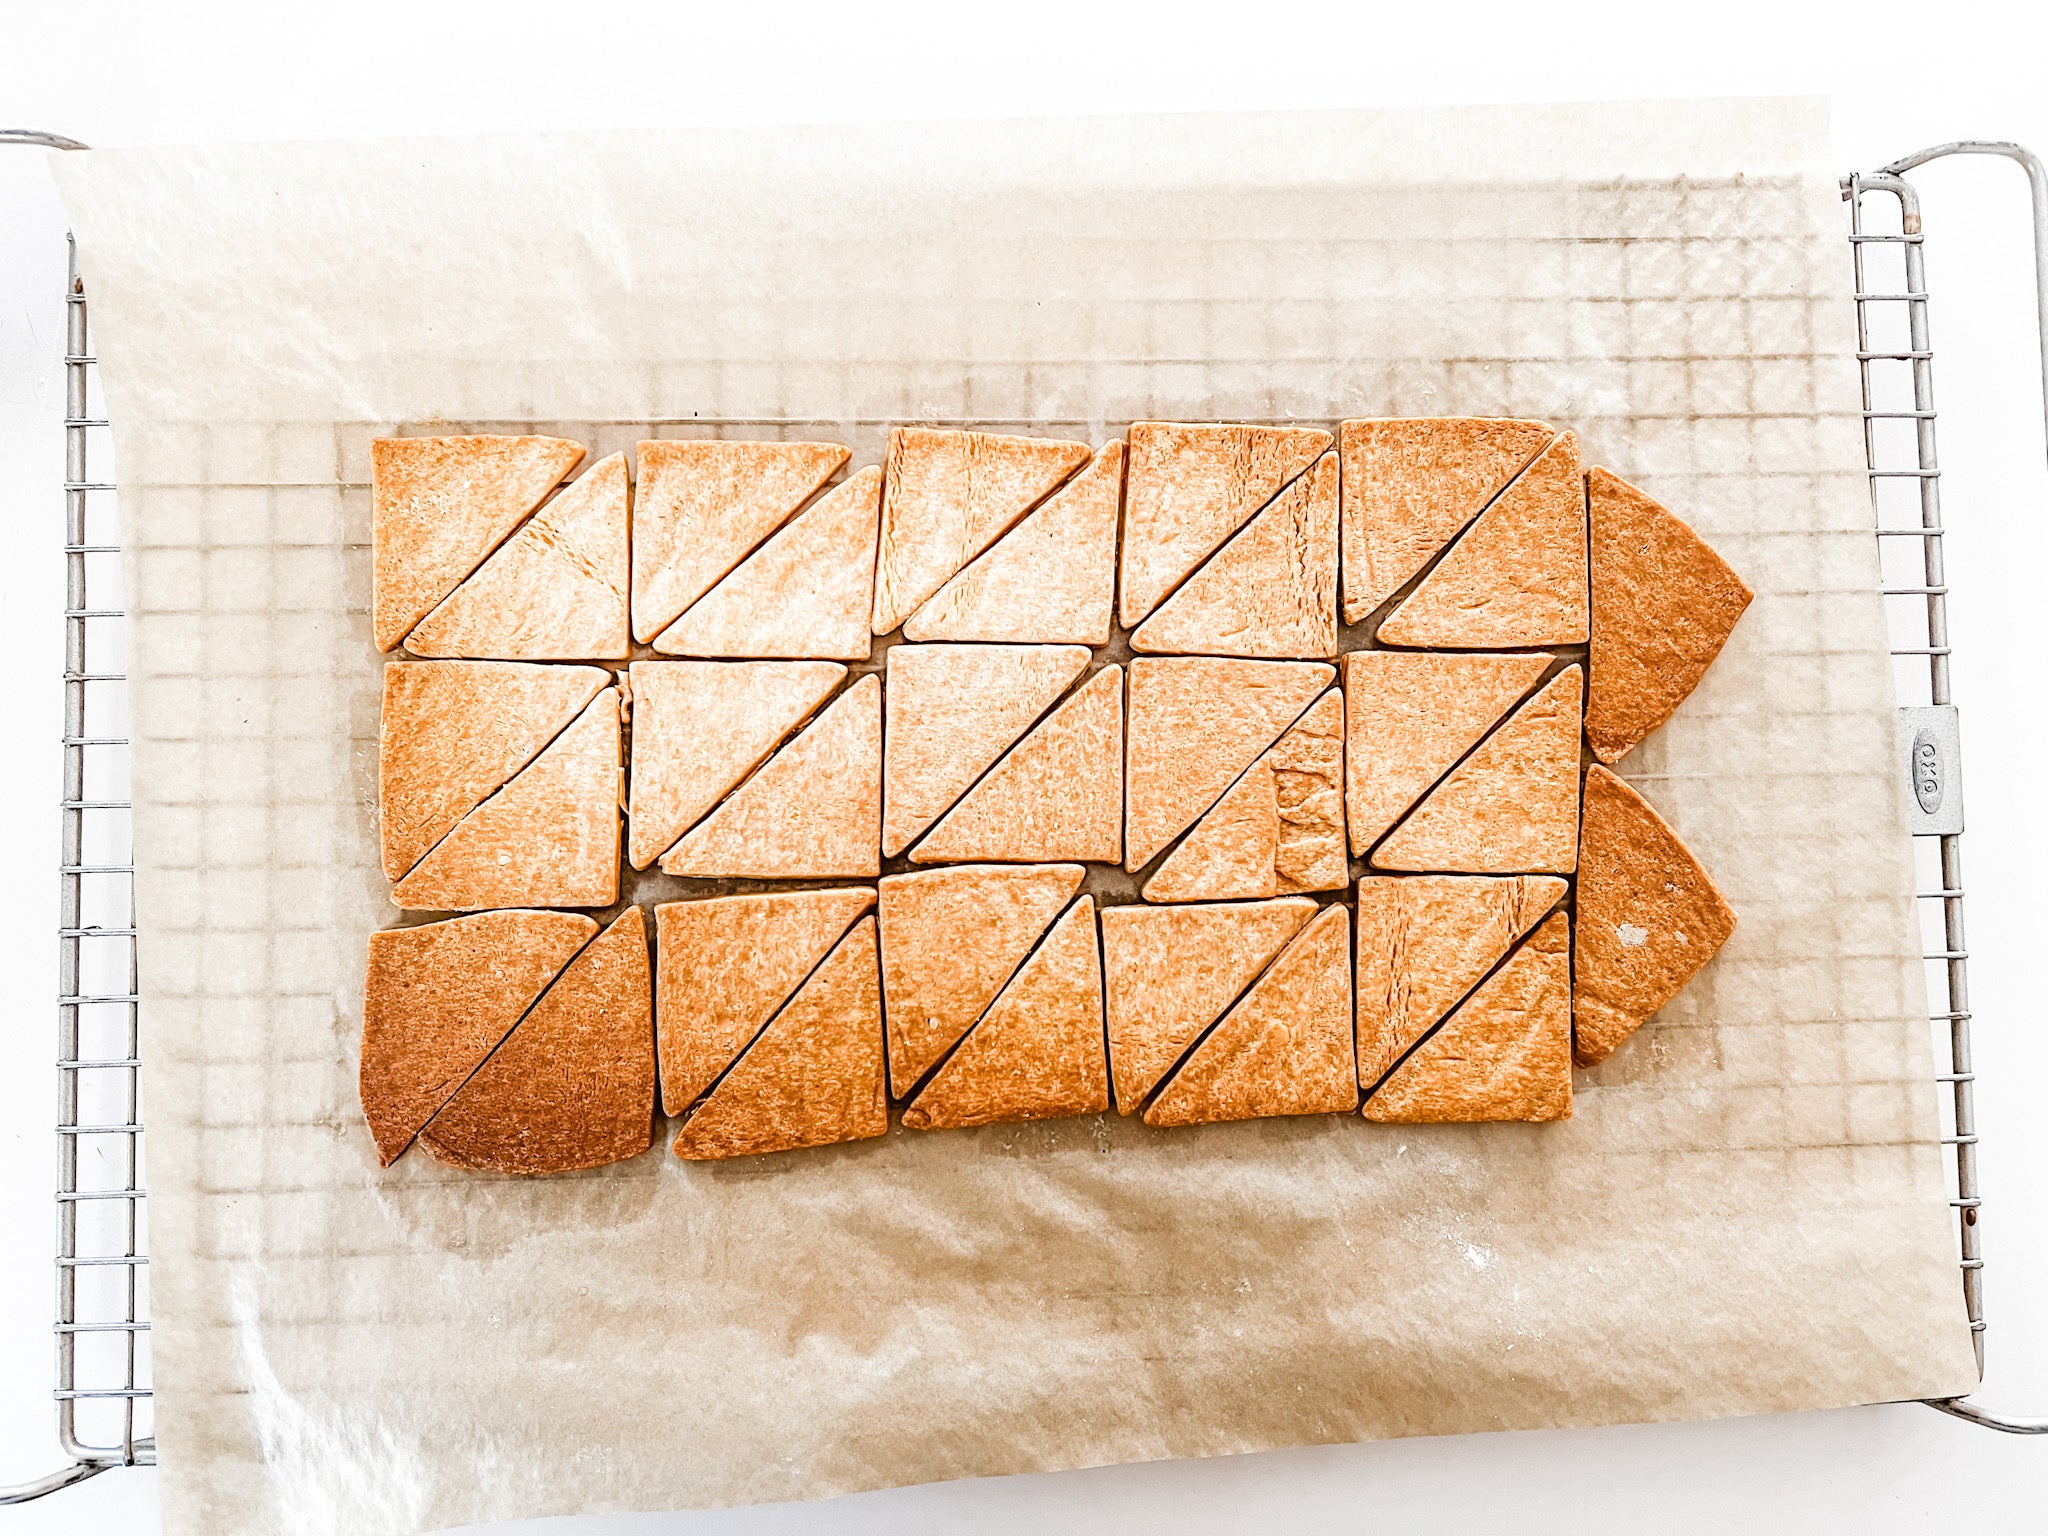
Set HSTs baked triangles aside. Freeze any extras you won't need today in a zippered freezer bag. (Read: make more quilted pies later!) Label it: Works Pies in Progress.
Bake the Pie
Mix and bake your pie according to whatever recipe you choose. I have made this Southern Living Fudge Pie for years.
Other recipes to try:
- Our Easiest Pumpkin Pie Ever from Southern Living
- Sweet Potato Pie from Small Town Woman
- Best Chess Pie from The Pioneer Woman
- Chocolate Chess Pie from Southern Bite
Let your pie cool completely.
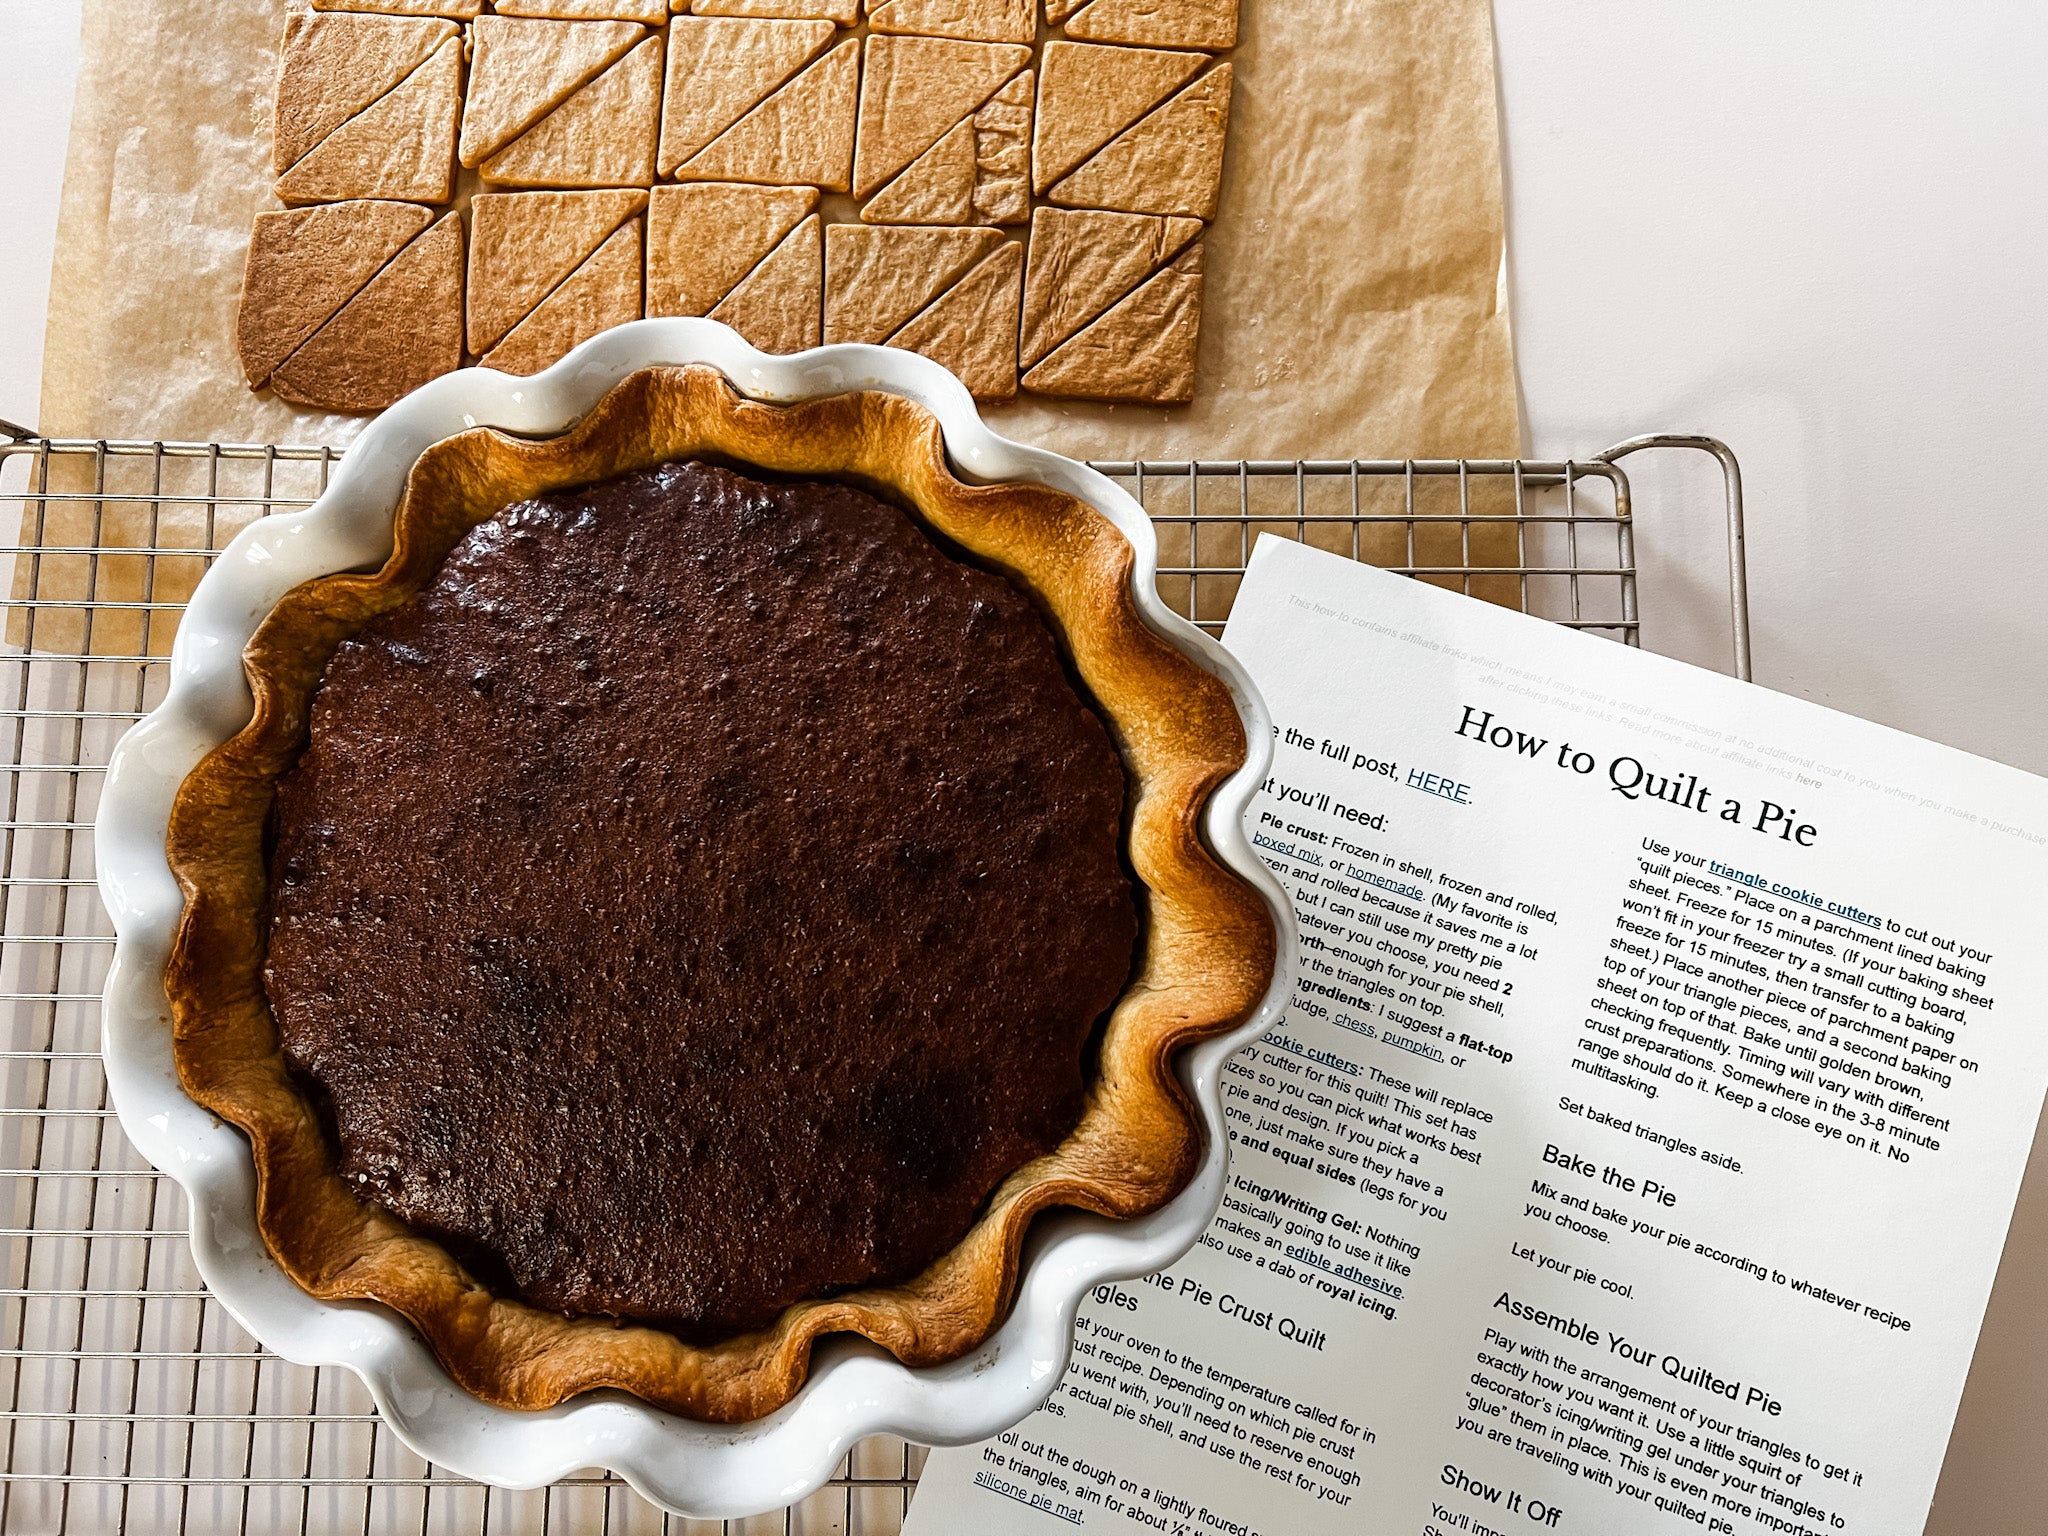
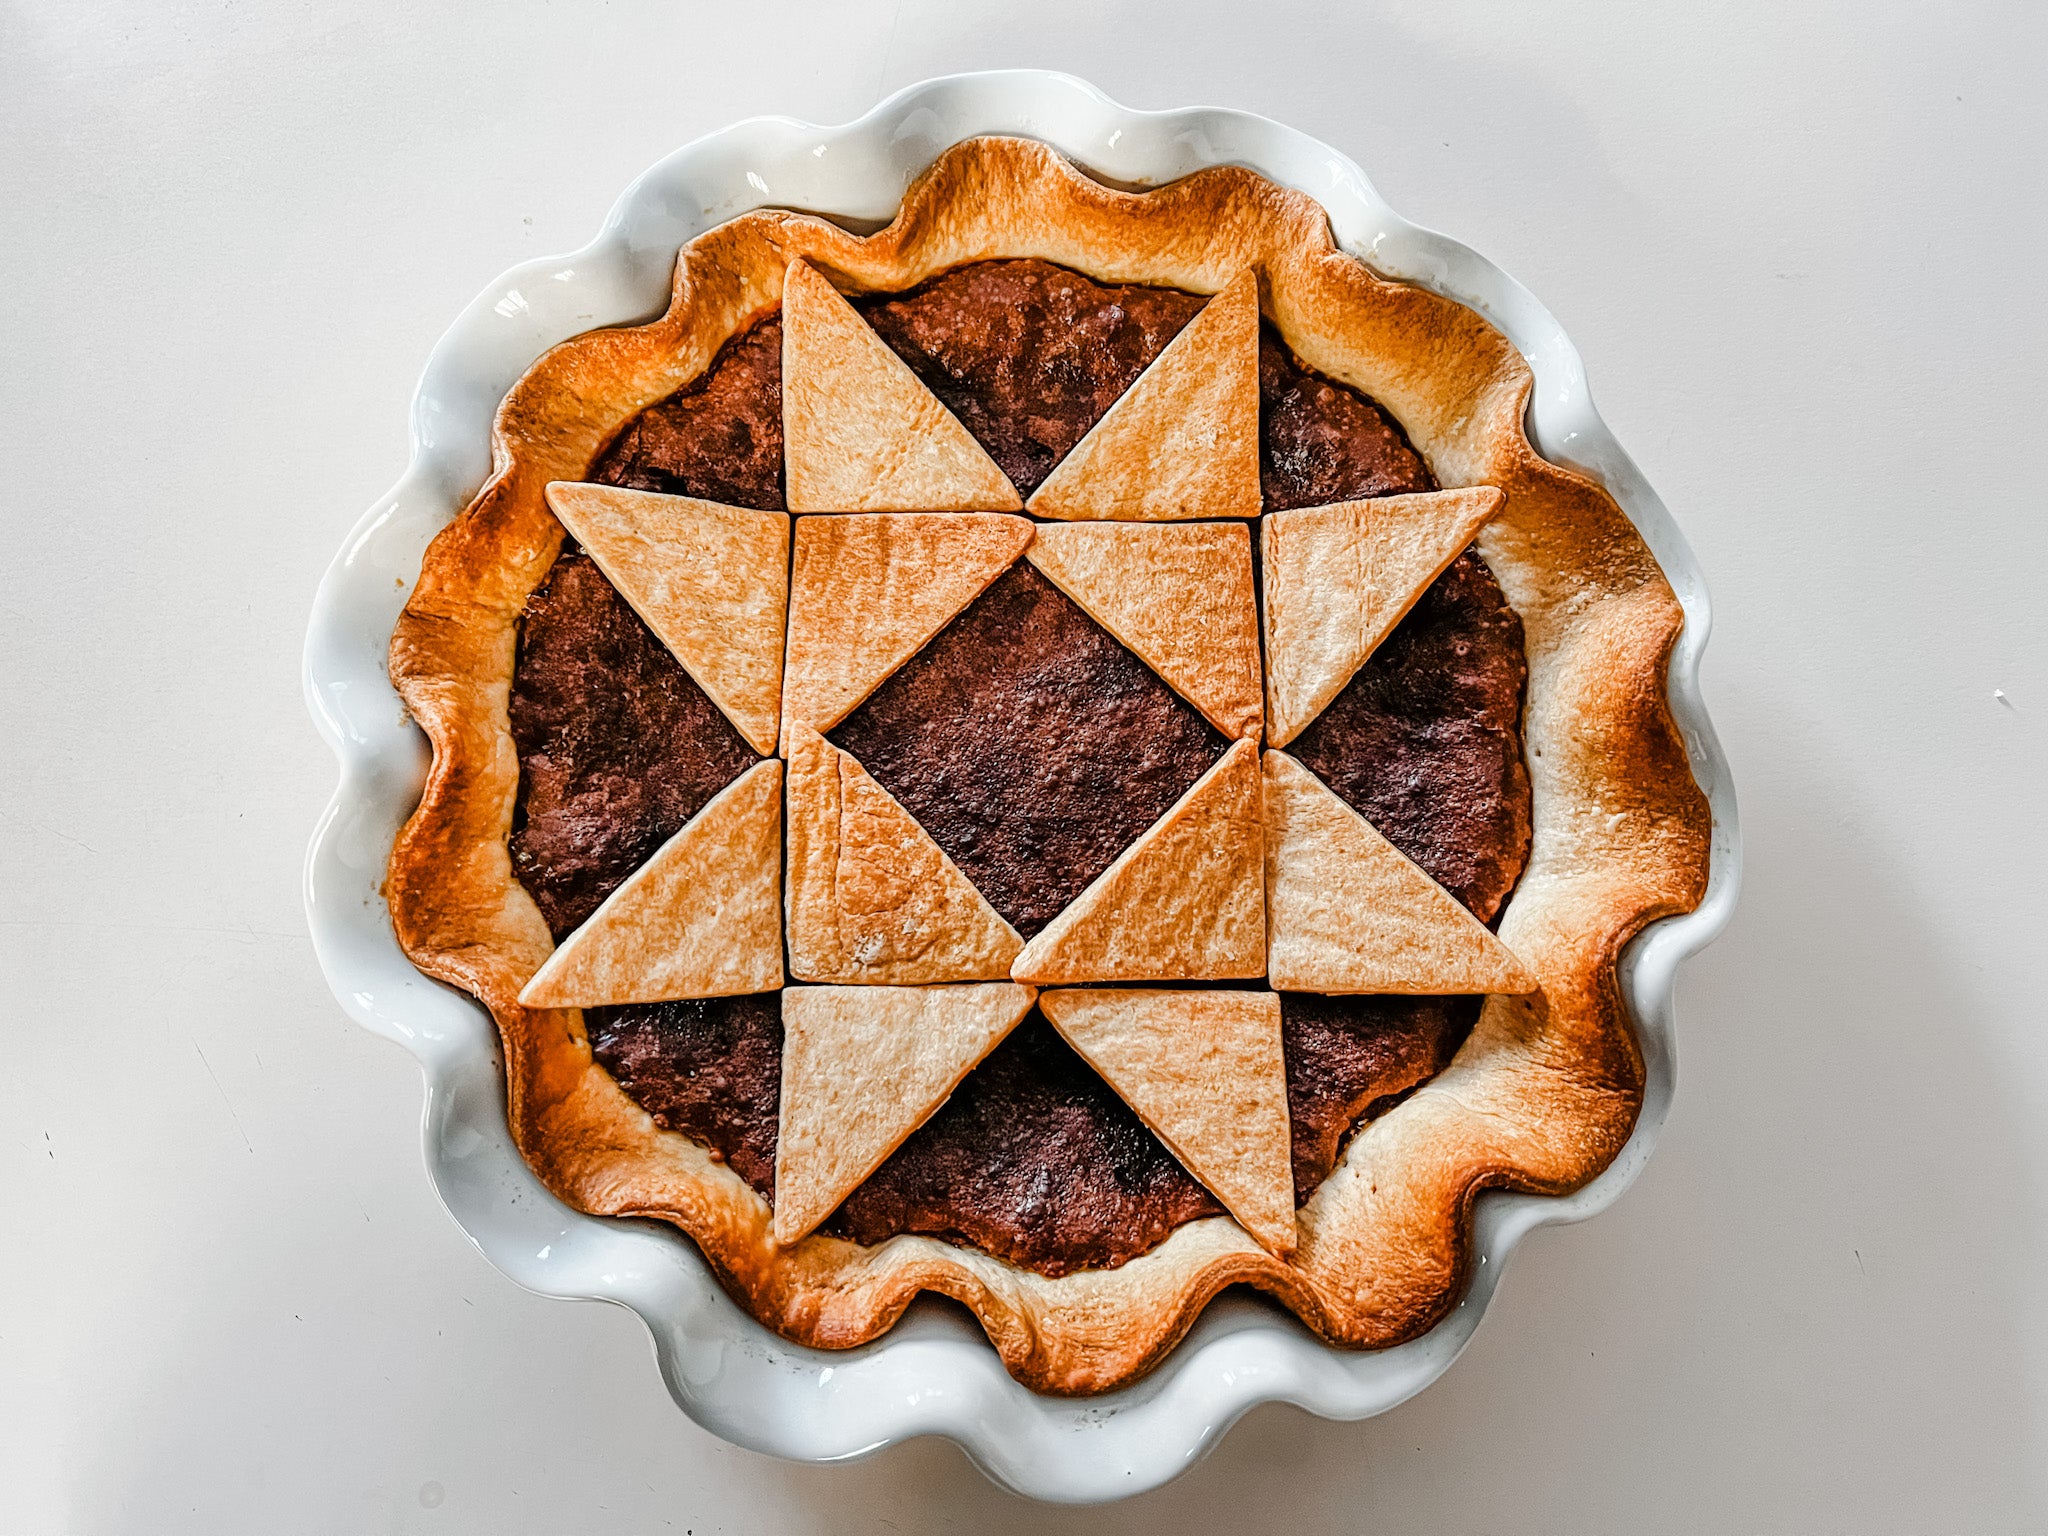
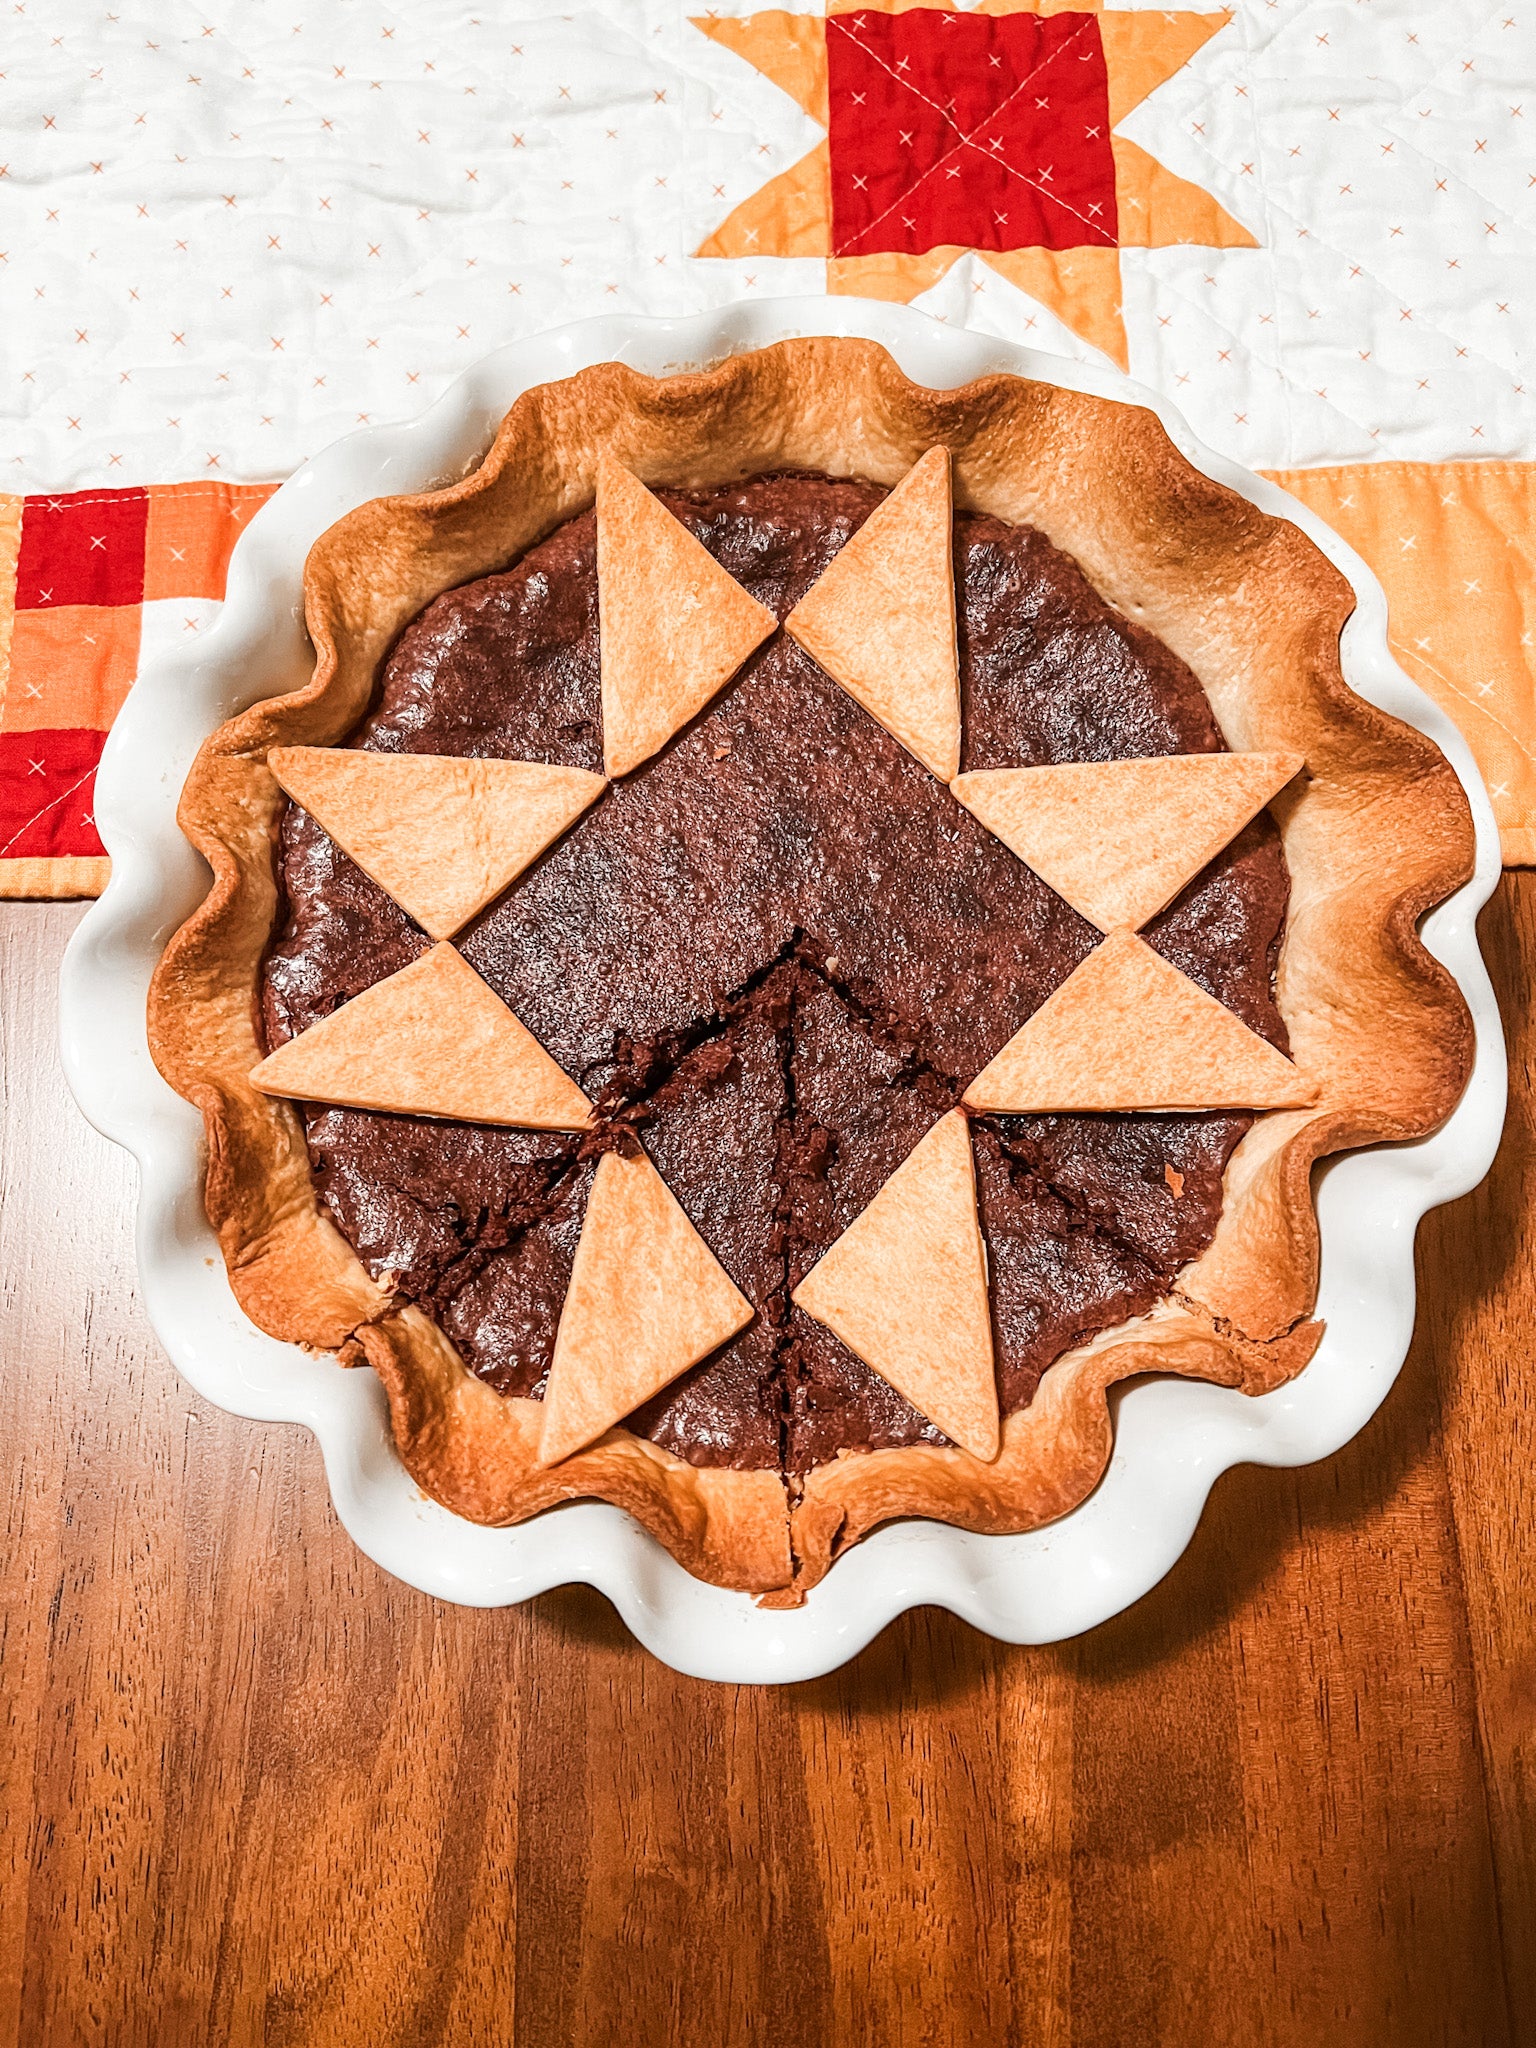
Quilt Your Pie!
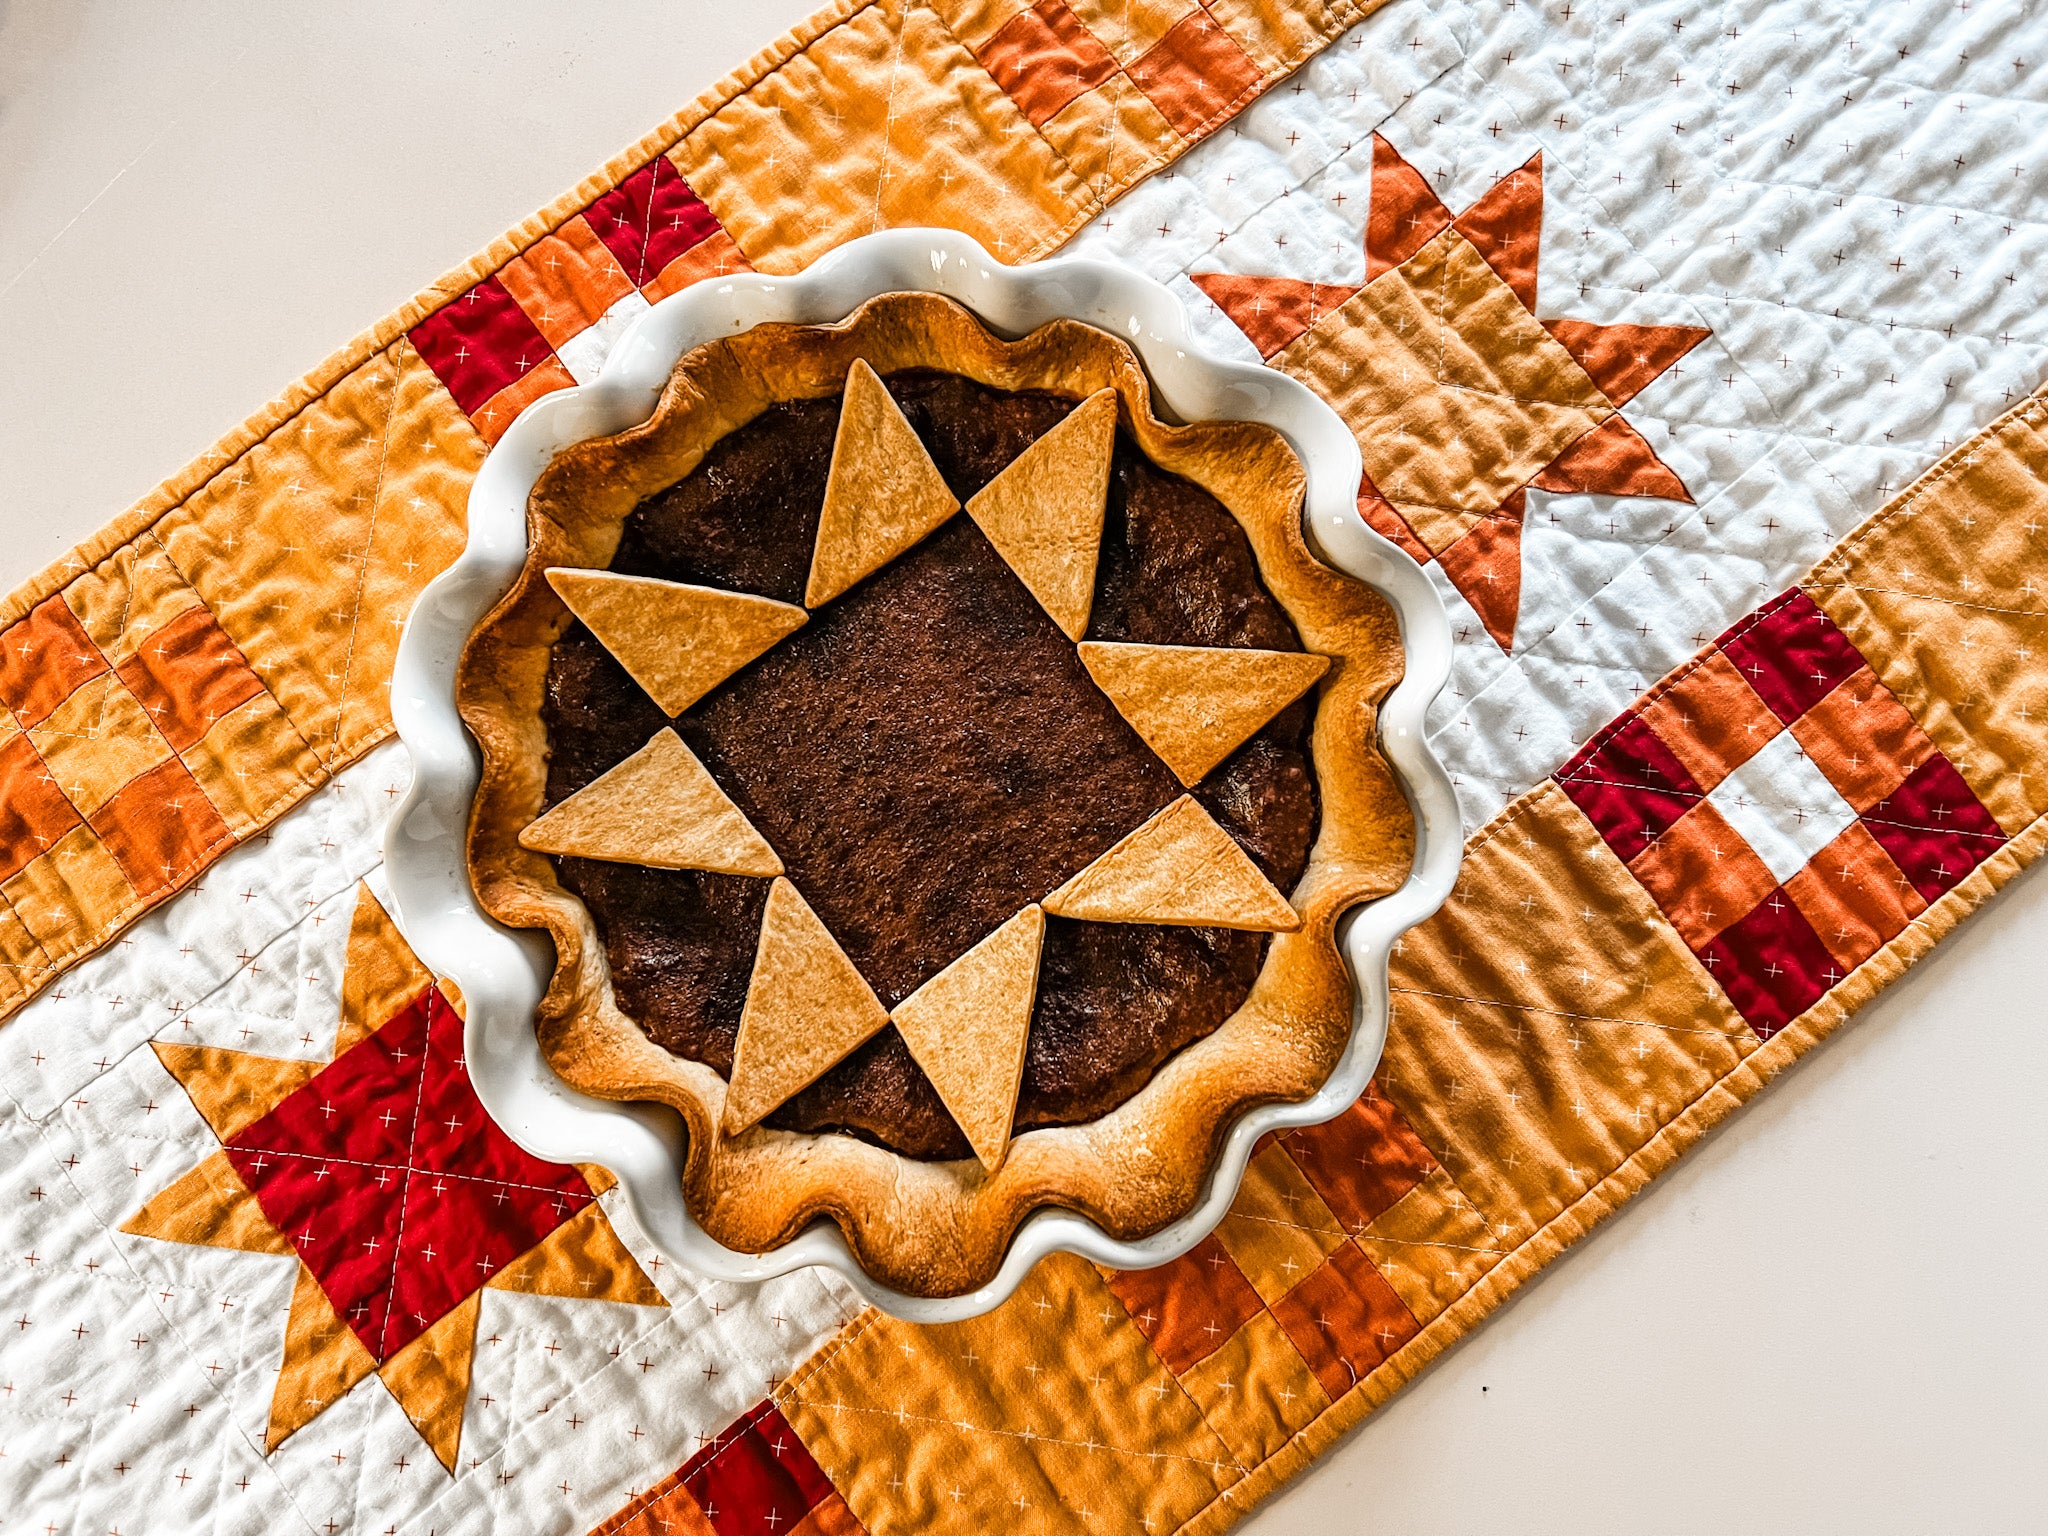
Play with the arrangement of your triangles to get it exactly how you want it. I arranged my triangles in a star to match the sawtooth stars on my Pockets Full of Blessings table runner. You can add more triangles or come up with your own design!
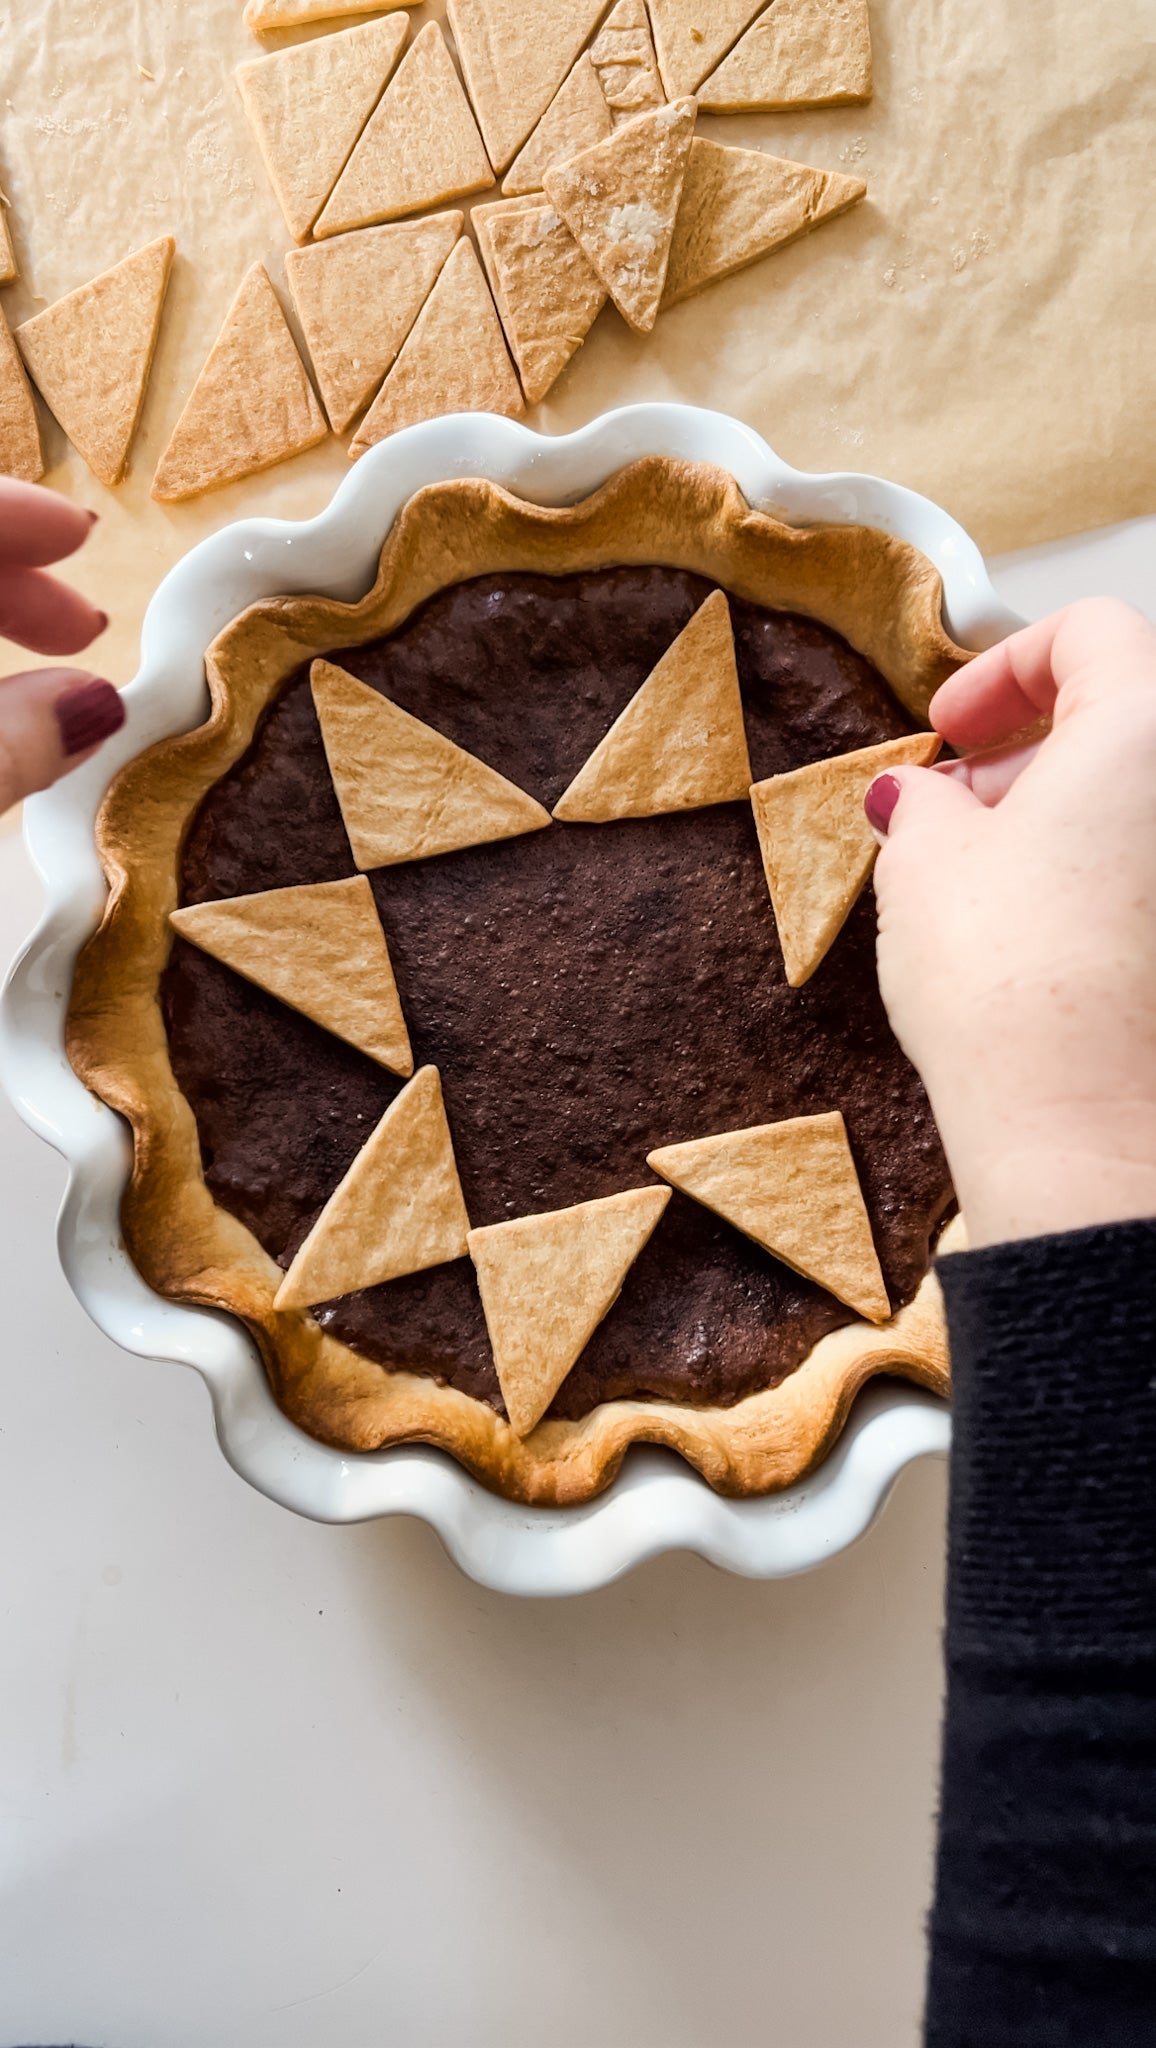
Use a little squirt of decorator’s icing/writing gel/edible adhesive/royal icing under your triangles to “glue” them in place. This is even more important if you are traveling with your quilted pie.
As a bonus, the star design gives you a nice visual to cut even pieces!
Show It Off!

Obviously, you’re going to impress at any gathering with a quilted pie! Share it on social too with #QuiltedPie and #SewWorthyMama so I can see and share it, too!
A quilted pie looks best over a quilted table runner! Grab a copy of my Pockets Full of Blessings pattern collection and start a new family tradition. The Table Runner has pockets along the sides to hold Gratitude Journaling Cards – a printable included with the collection. Start a conversation about your blessings with your family, fill in the cards, and collect and save them in the Keepsake Pouch – pattern also included! This pattern is a family tradition and heirloom in one!
I can’t wait to see your pies and tablescapes!
Get a printable 1-page PDF of these instructions to keep on the counter, and save your device from the flour and butter!